Azure Installation
Included in this page are instructions to setup AuctionWorx
Note: The Dev-Docs have a better set of instructions for installing AuctionWorx on Azure:
https://www.rainworx.com/dev-docs/#manual_deployment_to_azure.htm
This document will describe the necessary steps to successfully deploy an instance of AWE on Azure using:
- Microsoft Visual Studio (2017 Express and up)
- Microsoft SQL Server Management Studio (2014 Express and up)
- Microsoft Azure account
- A free account with SendGrid.com
Note: Take careful notes of the Usernames, Passwords, IP Addresses, Database Names and anything else that could be important as you go. There will be many references to information added in previous steps.
Major Steps in this Process:
- Create a Database on Azure
- Setup the Database in SQL Server Management Studio
- Setup the Service Bus
- Setup the SMTP Service with SendGrid.com
- Open the project in Visual Studio
- Edit the Web.Config File in Visual Studio
- Using Visual Studio to Publish the Web App to Azure
- Using Blob Storage for Media Storage
- Testing your Deployment
Create a Database on Azure
Note: Having a naming convention is an important aspect to this setup. Throughout this document, you will see the use of an example Username or an example Resource Group name that all contain a unique theme. You can read more about how Microsoft recommends a custom naming convention but in short, you should plan on having a recognizable and unique string of characters that you can use when asked. (Eg. "RWexample1" or "TestAuctionSite")
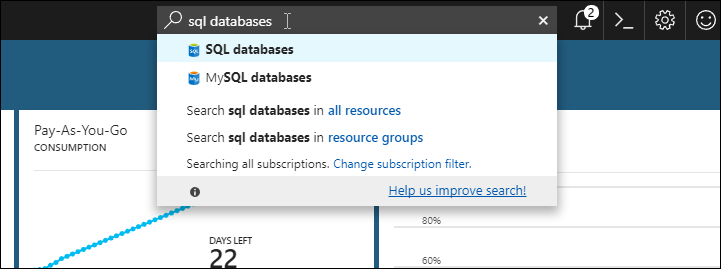
- Sign into the Azure Portal to get started.
- using the search bar at the top of the screen, type in "sql databases".
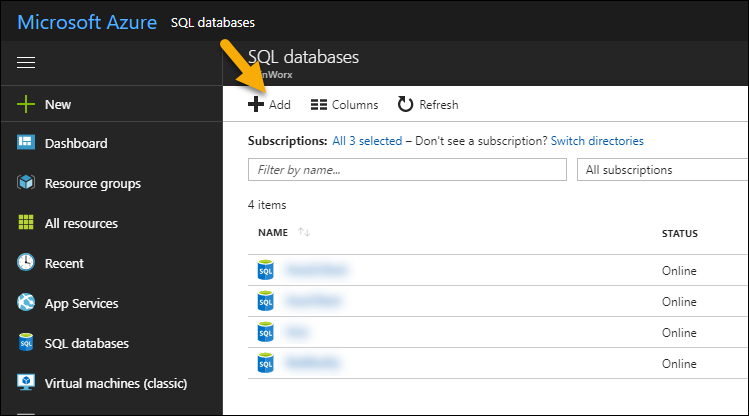
- From the SQL databases page click the + Add button.
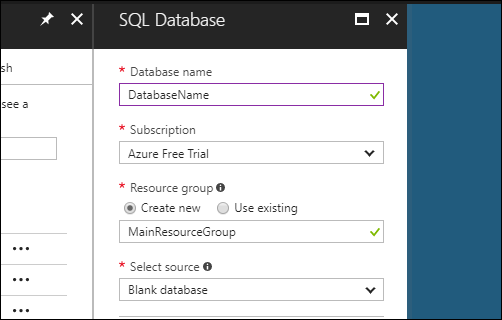
- Enter a Database Name, select a Subscription, select a Resource Group and choose Blank Database as the source.
- Next you will select a server to use. Create a new server and enter a unique server name.
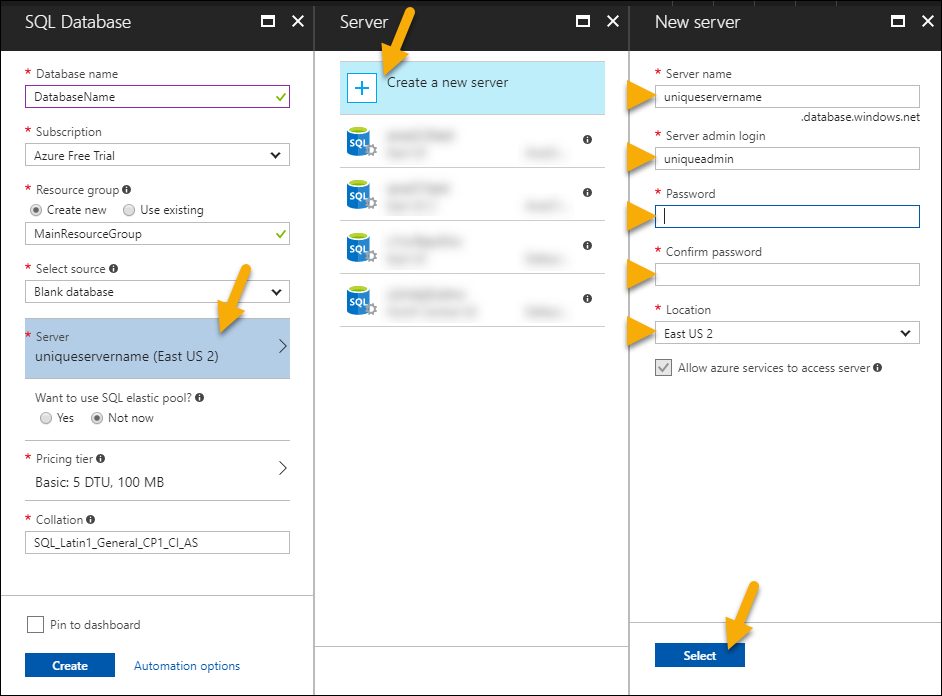
- Choose Not Now for the SQL elastic pool.
- The Pricing Tier should be Basic. (2GB)
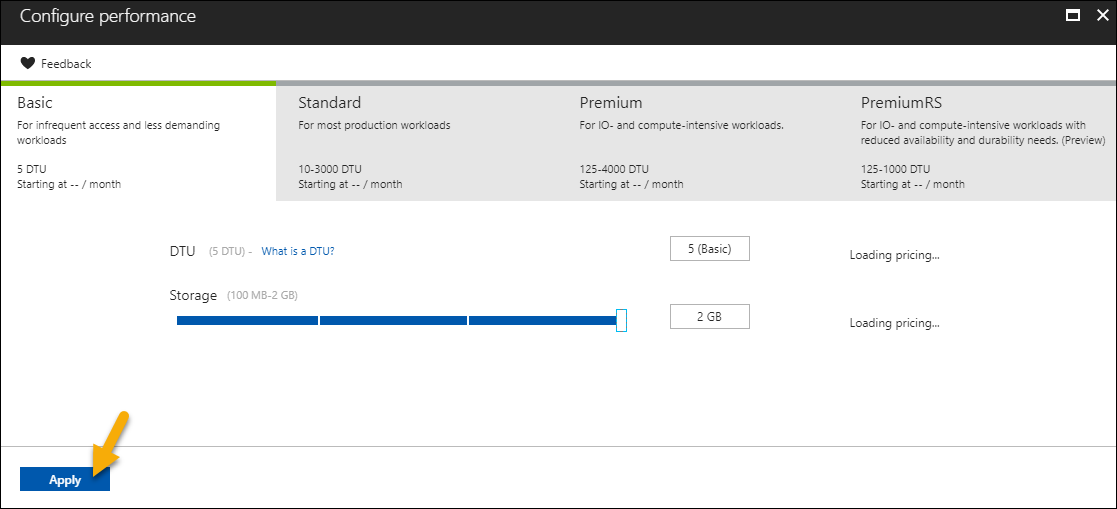
Warning: This pricing tier can be changed later if performance is poor but, this setting can make the difference between spending $5 per month or $1000 per month.
- The Collation can remain "SQL_Latin1_General_CP1_CI_AS".
- Finally, click Create.
Creating this database and server will take a minute or two.
Setup the Database in SQL Server Management Studio
This part of the process will require downloading and installing SQL Server Management Studio. The latest version of this program will work with any SQL Server. Now that the Database has been deployed, you can view the details in the Azure Portal.
- Open the SQL Databases area in the Azure Portal by searching for it or finding it in the left hand navigation.
- Open SQL Server Management Studio. When you open SQL Server Management Studio (SSMS) you will be greeted by a dialogue box asking for credentials to connect to a database server.
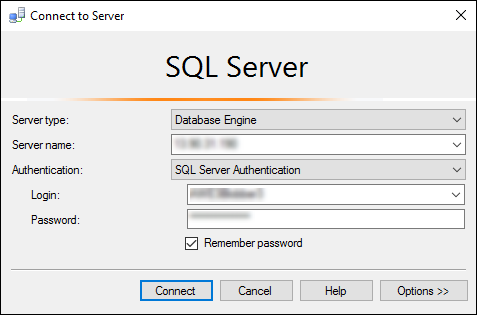
- Connect to Server - Fill in the credentials as follows to connect.
- Server type - Database Engine
- Server name - Enter the server name displayed on the database overview page from Azure
- Authentication - SQL Server Authentication
- Login - Enter the Login Name (used on step 5 of Create a Database on Azure above)
- Password - Enter the Password (used on step 5 of Create a Database on Azure above)
Click connect.
- In the frame to the left, you will see your server listed. Below that server you should see a folder called Databases. Open that folder and select the database.
- In a text editor, open the AuctionWorx.SQL file that came in the download package from RainWorx. It can be found in the SQL folder. Select all of the contents and copy it.
- Go back to SQL Server Management Studio and while the new database is selected, click on File > New > Query with Current Connection. Paste the contents of the AuctionWorx.SQL file in and click on Execute from the tool bar to run the script.
- Once that process has finished (should take about 2 minutes) your database is ready to be connected to the web app.
Setup the Service Bus
Note: As of version 3.1.7048R2 the Server Service is optional
The Service Bus allows SignalR to facilitate bi-directional communication between server and client. Practically speaking, the page can load updates without having to be refreshed like who the High Bidder is, Current Price and
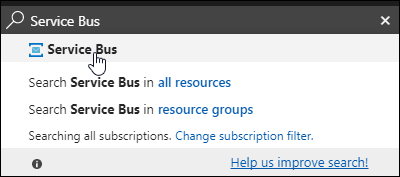
- Open your Azure Portal and search for "Service Bus".
- Click the + Add button.
- Enter a Name, choose the Standard Pricing Tier, select a Subscription, Resource Group and a Location. Then click Create.
- Wait for the Service Bus to finish deploying, then open it.
- Click the Shared Access Policies setting and then click on the row with the policy that says "RootManageSharedAccessKey". This will open a modal that will contain Primary and Secondary Keys and Connection Strings. Copy the Primary Connection String.
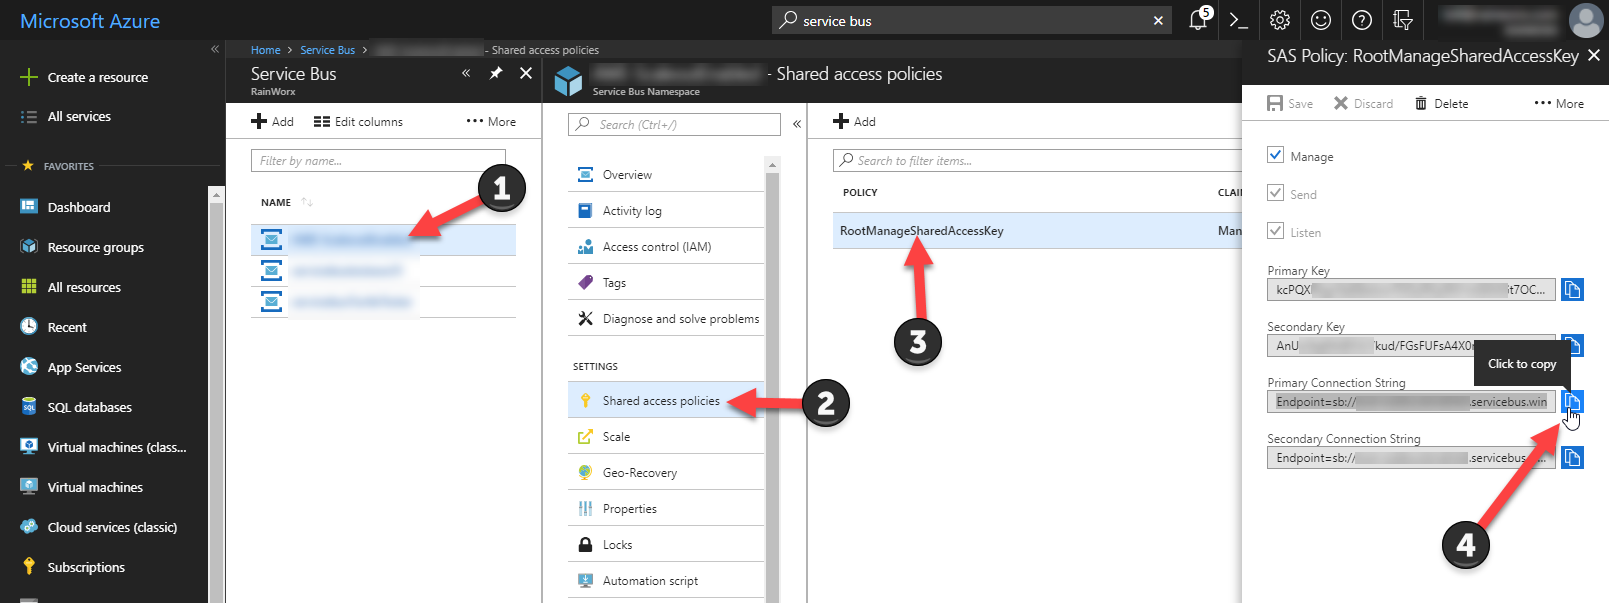
Keep the connection string in your notes. In a later step we will enter this connection string into the Web.Config file so the software can connect to the Service Bus and create threads in it.
Setup the SMTP Service with SendGrid.com
RainWorx recommends using the service SendGrid.com to new clients that are unsure what SMTP (Simple Mail Transfer Protocol) service to use. SendGrid.com provides a free option for those who are just getting started and are unsure how what level of service will be required.
If you have a different exchange service that can provide you with SMTP settings you can skip this step.
- Go to SendGrid.com.
- Click the Try for Free button.
- Create a new account with the Free 12k $0.00 / mo option.
- Verify your email address.
- Wait for the provisioning process to be completed. This should take 1 or 2 minutes.
- Once provisioning has been completed (You should receive an email saying it has) you can create an API Key. Reload the SendGrid.com page.
- Click Settings > API Keys then click the Create API Key.
- Fill out the form. Choose a General Key and give it full permissions for all of the settings.
- Copy the API Key and paste it into your notes.
The API Key is used as the Password for the SMTP settings. Host, Username and Port should be the same for anyone using SendGrid.com with AuctionWorx. Your Settings will look something like this:
Host - smtp.sendgrid.net
Username - apikey
Password - SG.Yk6bdk85RMqXRi543zI4gQ.cFpr3zLPnIQTviWN4uYgusoLvdliq3XY8g...
Port - 587
Open the project in Visual Studio
This part of the process will require downloading and installing Microsoft Visual Studio 2017.
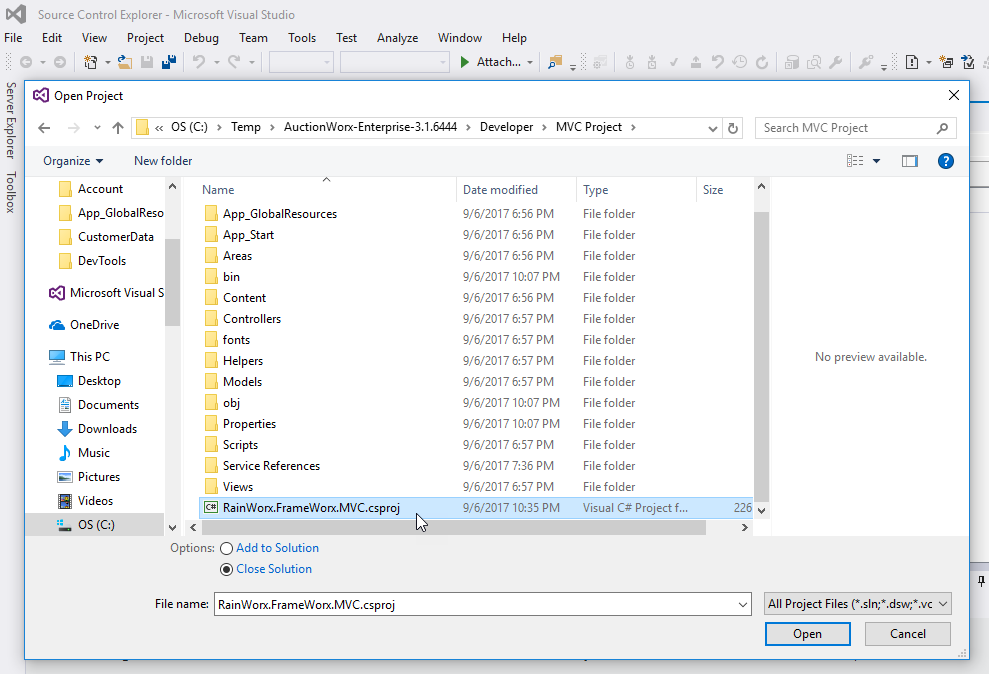
- In Visual Studio 2017, open the AuctionWorx solution. Click on File > Open > Project, select the folder that contains the project and open the RainWorx.FrameWorx.MVC.csproj file.
Edit the Web.Config File in Visual Studio
IMPORTANT: Before making any changes to your web.config settings, if you are deploying to Azure, delete the file named "web.config" and rename the file named "web.config.Azure" to "web.config".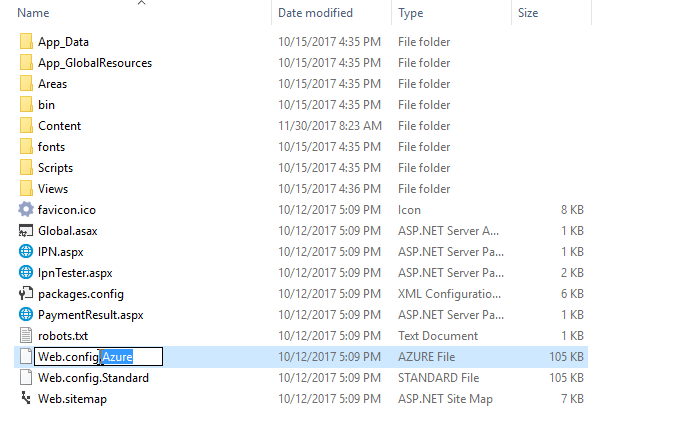
This section of the process is where the SMTP settings, Database Connection settings and the License Key are installed into the project to make it publishable.
-
Open the web.config file from the Solution Explorer and use the find feature (Ctrl + F) to find "connectionStrings".
- Fill in the information using the information that you have saved from creating the database server and database.
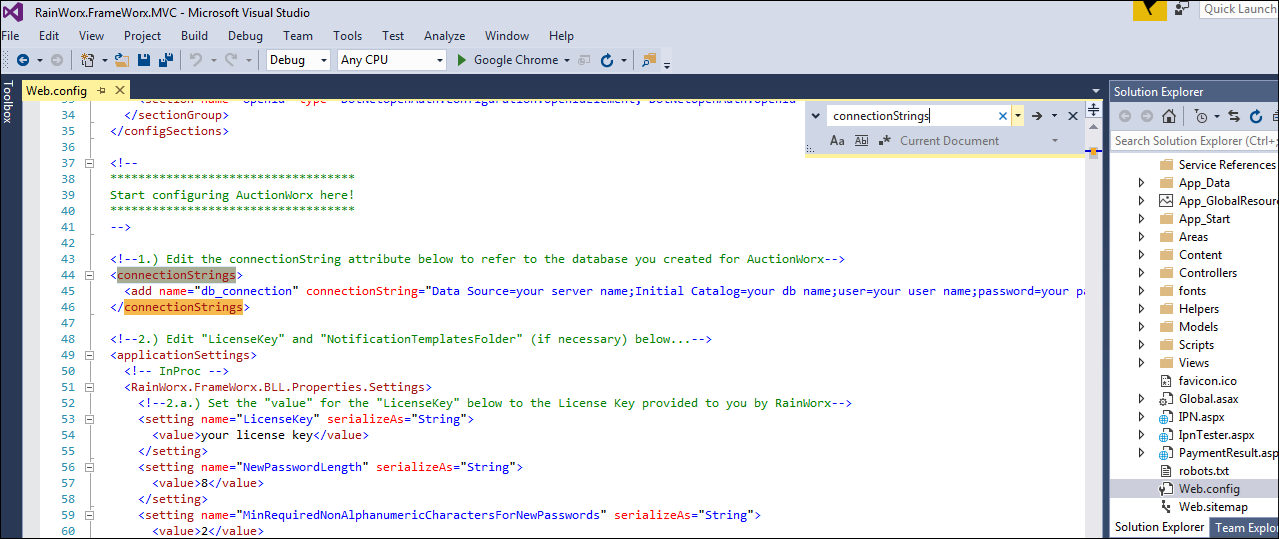
Note: Change the following sections of code on this line to match the information that applies to your setup:
Data Source=Your SQL Server IP Address;
Initial Catalog=Your Database Name;
user=Your SQL Server Username;
password=Your SQL Server Password;
These settings are the same ones used to connect to SQL Server Management Studio.
Note: Be sure that only the characters that are in each of these data fields are used after the equal sign and that there are no spaces before the semicolon.
- Use the find feature (Ctrl + F) to find "SMTP".
- Enter the settings that you recorded earlier from doing the SendGrid.com steps into the quotes after each setting name.

- Use the find feature (Ctrl + F) to find "LicenseKey".
- Inside the <value> tag, enter in the License Key that was provided in the purchase confirmation email from RainWorx.

Using Visual Studio to Publish the Web App to Azure
Now that the web.config file contains your License Key, SMTP Settings and Connection Strings, it is finally time to publish your web app to Azure.
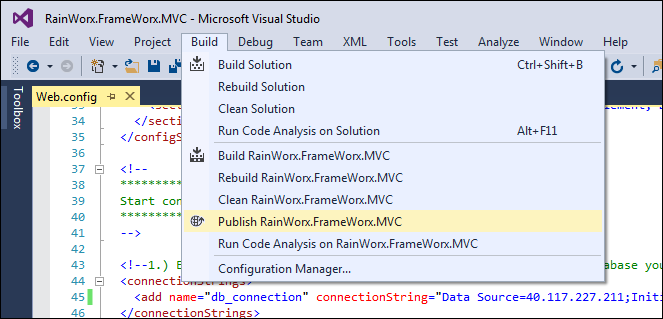
- Click Build > Publish RainWorx.FrameWorx.MVC
- On the Publish screen, select Microsoft Azure App Service.

- Add the Azure Account that you built your VM on. Follow the steps as prompted until Visual Studio 2017 is connected to your Azure account.
Note: Microsoft's integration between Visual Studio and Azure is always changing. Make adaptations as needed.
-
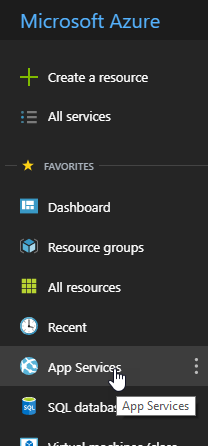
Switch over to the Azure Portal and add a new Web App. Click App Services from the left navigation and click the + Add button.
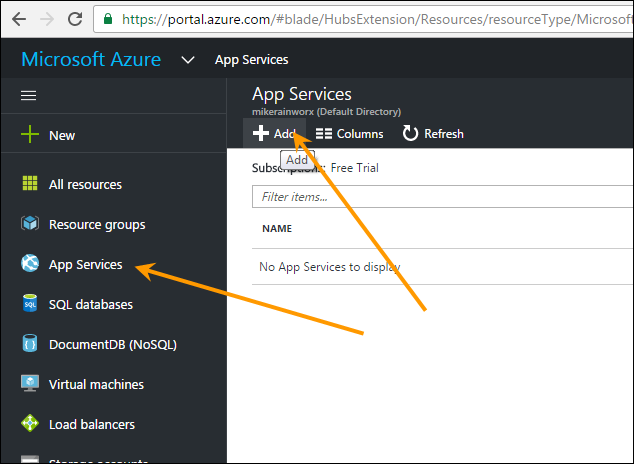
-
Fill in the form with the following information. I'll put in my information for this example:
App Name - RWexample1
Subscription - Free Trial
Resource Group - RWexample1 (should already exist)
App Service Plan - click Create New and enter "RWexample1" | "US East" | select "B1 Basic"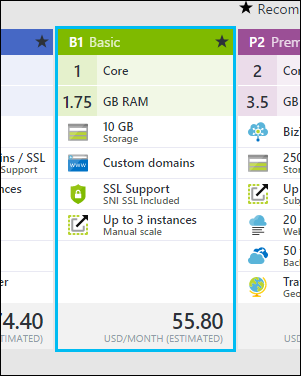
- Click Create.
- Wait for the Web App to deploy on the dashboard.
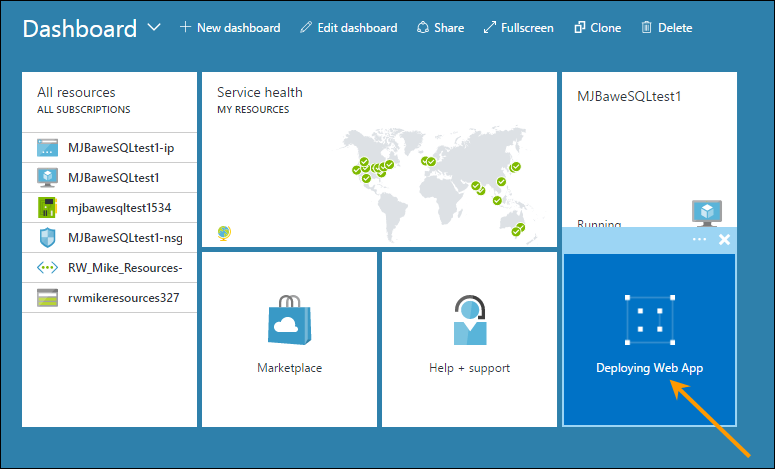
- Once it is finished deploying, open it and take note of the overview.
- Now that the Web App Service has been initiated and Visual Studio has been connected to Azure, Open Visual Studio, Click Build > Publish and select Microsoft Azure Web Apps from the Profile tab.
- Select your Azure account, select Free Trial as the Subscription and there should be an app you can select in the Existing Web Apps box. Click OK.
- The next screen showing the Connection tab should be prefilled. You should take note of all the information here.
- Click Publish.
The Publishing process should automatically open the web app upon completion. There are a couple of settings that need to be adjusted before running the final tests to confirm a successful deployment.
Making adjustments to Application Settings
Note: Some of the settings need to be adjusted from the default after the app has been created.
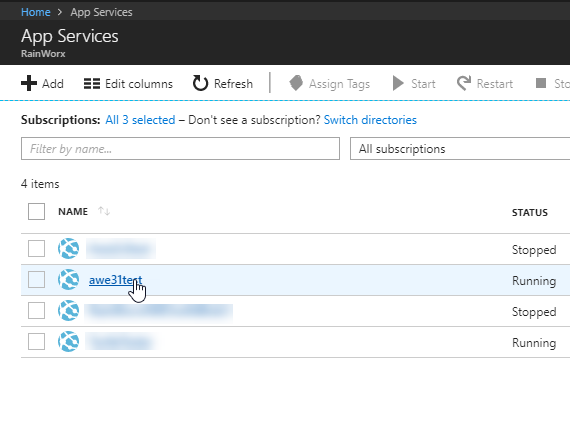
- From the Azure Portal, click the App Services option in the left hand navigation.
- Select the app that you are installing.
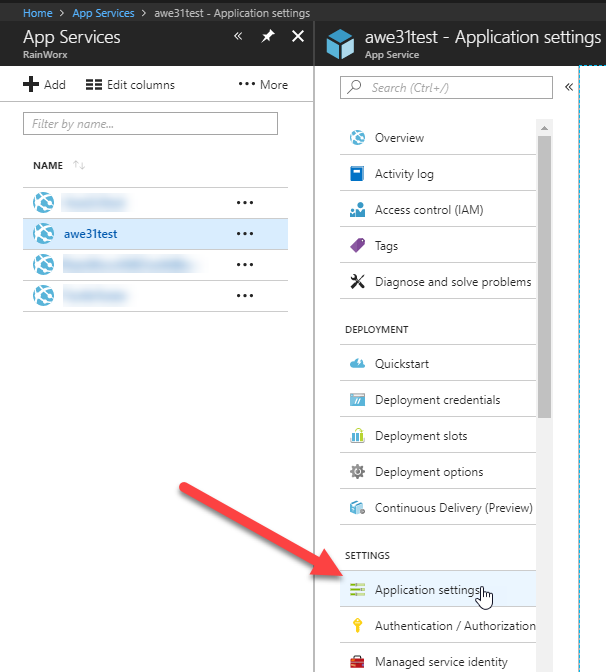
- Next, select the Application Settings option.
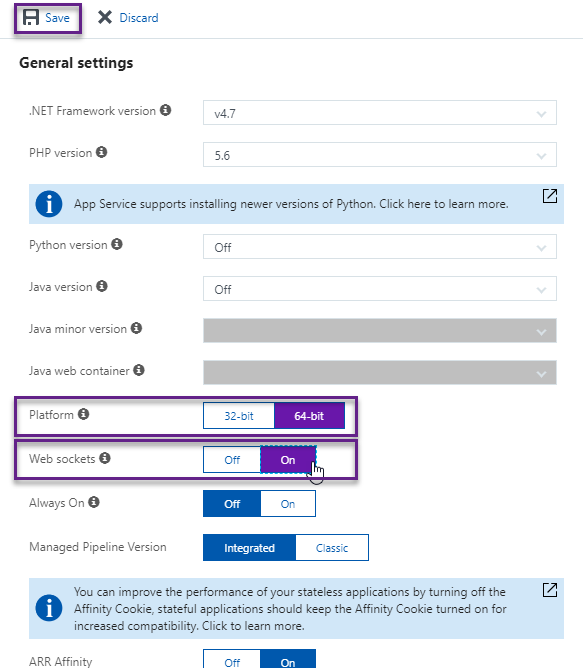
- Finally, switch the Platform to 64-bit and turn Web Sockets on, then click Save.
Using Blob Storage for Media Storage
Creating a Storage Account
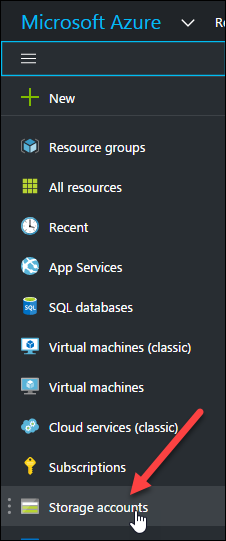
- In the Azure Portal, click Storage Accounts from the left navigation.
- Click the Add button.

- Enter the information required to create a new storage account as follows. Make sure that the Location field matches the location used in other steps during the process. Be sure to check the Pin to dashboard checkbox at the bottom.
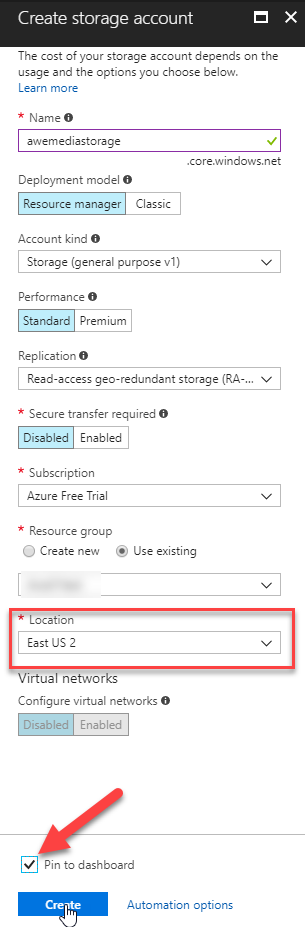
Note: For example, if you used East US 2 when you created your resource group then you should use East US 2 for the storage account.
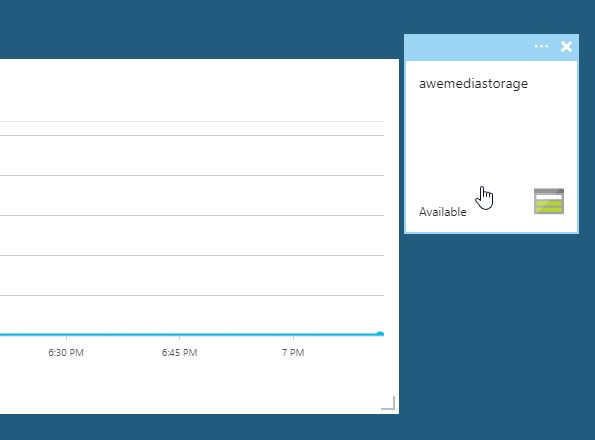
- Once the Blob Storage has finished deploying. Click on the dashboard item to open it.
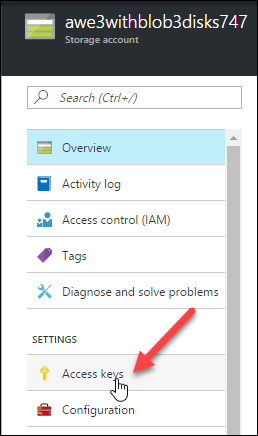
- Click the Access Keys option below the Settings subtitle.
- Copy Key 1 and the Storage Account Name from this final screen.
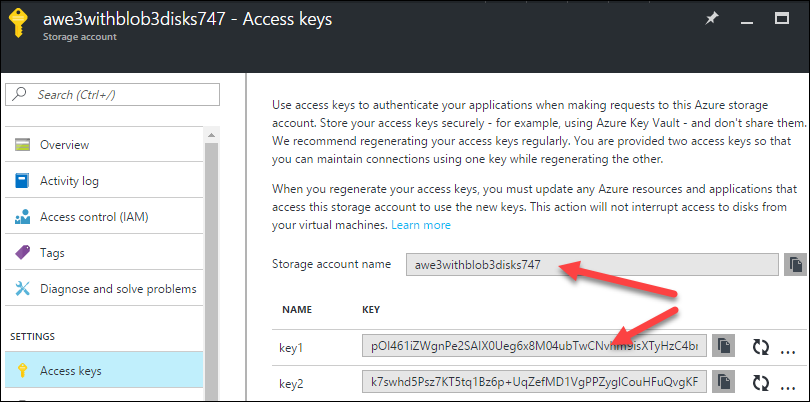
- Enter this Connection String into the web.config. It should look like the following example:

Running the SQL to Apply Necessary Changes
This process will enter the location of the Blob Storage in all of the necessary fields in the Admin Control Panel > Advanced > Images area. The SQL script will fill in all of the values so there is less chance to enter a typo.
- Log in to the SQL Server Management Studio and connect to the database that you have already setup.
- With the database selected press Ctrl + N or File > New > Query with Current Connection to start a new Query.
- Enter the following into the new query:
update RWX_Attributes set Value = 'BlobStorage' where Value in ('DirectFileSystem', 'DateHashedFileSystem')update RWX_Attributes set Value = 'BlobStorageURI' where Value in ('DirectURI', 'DateHashedURI')
- With the text entered and the database selected, click the Execute button.

Once the query is done executing the job is done. The system should now be storing all of the images on your site in the blob storage area of your Azure account.
Testing your Deployment
- Enter the URL provided by Azure into a browser to view your site.
If your web app now loads you have correctly configured your database connection strings.
- Login in as the admin and change the contact information.
- Navigate to Site Preferences > Contact and change the Administrator Email and System Email Address to an email address you have access to. Click Save.
- Navigate to Site Preferences > Setup and change URL and Secure URL to the domain of the URL in the address bar. Click Save.
- Sign out and create a new user. Click Sign in and on the sign in page, click the Register Now link.
- Fill in the form with Test User type information and make sure that the email address is one that you have access to. You must use a different email address than the one entered for the admin user. Finish the registration form and click Register.
- Go to the verification email in your inbox. Click the link provided to finish the verification process and sign in as the new user.
Once you click Complete Registration, if you see a verification email in your inbox, that means that your SMTP settings are correctly configured.
- Signed in as the admin.
- Click
- Select a category and
- Enter a simple Title, simple Description, a Starting Bid of $100
If you see a
-
- Type in a bid of $200.00 and click Submit Bid.
If you see a message that says "You are currently winning this item!" then SignalR and asynchronous bidding are correctly configured.
- Sign in as an admin again and navigate to Admin Control Panel > Advanced > Images and check that the UploadListingImage Saver and Loader values contain "BlobStorage" and "BlobStorageURI".

- Go to the Azure Portal and check that your Storage Account has a Container named "assets".
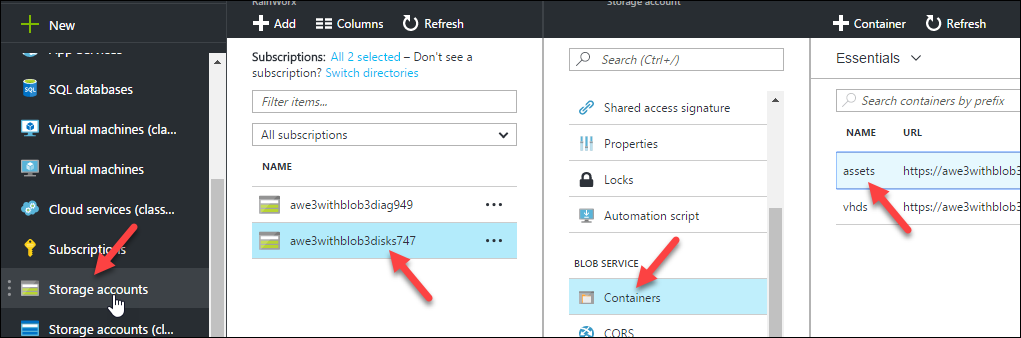
If the Storage Account you created has a Container named "assets" and the Admin Control Panel > Advanced > Images page has BlobStorage in the various Save and Load fields, you have correctly configured your site to use Blob Storage.