Import CSV
This section is for Importing Listings from a simple CSV file (Comma Separated Values).
Using a template, the administrator can fill in a spreadsheet with all of the information that would make up a listing. This is designed to bulk import listings.
Download Blank CSV Template - Clicking this button will download the specific template that matches the systems current settings and can be filled in with listing information for Import
CSV Import Help - Clicking this button will open a help window, customized for the current state of the admin settings, that describes how to fill out the CSV Template. For more information see CSV Import Help
Validate Data ONLY - When checked, the Upload CSV button will validate the data without importing the listings to the site. When unchecked, the Upload CSV button will perform both operations.
Report Email Address - The email address entered here will receive the report concerning the data integrity and the listing import success.
Choose File - Clicking this button will bring up a file browser to choose a CSV file for import.
Upload CSV - Clicking this button will begin the process of validating and/or Importing the CSV file that has been loaded based on the selection of the "Validate Data Only" checkbox.
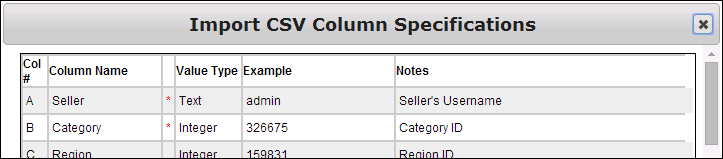
CSV Import Help
This section within your installation is dynamically updated to guide the administrator through the required syntax of importing listings with "CSV Import".
Download the template
Simply click the button labeled "Download Blank CSV Template". This template will be customized to match administrative settings and custom fields.
Working with a CSV file
CSV stands for Comma Separated Values. It is a simple way of compacting a table into a linear string of information. This type of file can be opened in Excel or a text editor.
Spread Sheet Application
If you are using a standard spreadsheet application like Excel, the formatting rules should mostly be set. Be sure not to save it into a different format before uploading it to the site.
Text Editor
If you are using a text editor that does not format automatically, you need to follow these rules:
- All fields for each item must be separated by commas.
- If you have commas within a field, you need to separate that field with double quotes (e.g. One,Two,"Three,Four,Five",Six).
- If there are no commas, the double quotes are not necessary.
- If there are quotes within a field, the entire field needs to be quoted. An extra set of quotes for the quoted data is required also (e.g. A,B,"C ""Special Edition""",D).
- If you leave a field blank, make sure there is an extra comma as a placeholder (e.g. 1,2,,4).
- Each listing must be on its own single line without any page breaks.
Importing Photos
The image columns use a URI with an "http" or "https" prefix if the images are already online. Simply enter the image URI into the image column, in the appropriate row and the server will take it from there.
If you are uploading your listing images to your web server, you may have to use a "file://" reference instead of "http://" For instructions on what these references should look like, view the “CSV Import Help” from the “Import CSV” page (in the Admin Control Panel). It will also indicate what your absolute file path is.
Validate your Import first
Once you have your data correctly mapped in your CSV file, choose the file with the Choose File button and check the "Validate Data ONLY" checkbox. This will run through the list as if it were uploading the information and will email you a report about the validity of your CSV file. If the report shows no errors or validation issues, go ahead and uncheck "Validate Data ONLY", select the file and upload the CSV file again.
When the Import is complete a report will be emailed with details about any errors that came up.