Tutorial: Language Translation
This is a walk-through tutorial on how to localize AuctionWorx to different languages.
AuctionWorx is designed from the ground up to be fully localized for a single language or multiple languages. All of the text in the software is mapped to resource files where the text that gets displayed on the site can be modified. Multiple sets of resource files can be used to offer a multilingual site that maps to user preferences. The process described in this document will present free and easy to use tools that allow the owner of the site to access the resource files and make the desired changes.
![]()
Note: As a courtesy, we provide information about how to use certain third-party products, but we do not endorse or directly support third-party products and we are not responsible for the functions or reliability of such products.
Topics in this Tutorial
- Using FTP to Copy the Resx Files
- Naming the Files
- Editing a Resx File
- Upload the Translated Files to the Server
- Applying the Changes in the Admin Control Panel
- Translating Categories
Using FTP to Copy the Resx Files
FileZilla is the recommended program for accessing your files on the server through FTP. Here is the link to download FileZilla: https://filezilla-project.org
- Open FileZilla and connect to your server using the information provided in the Hosting Setup email you received from your hosting provider.
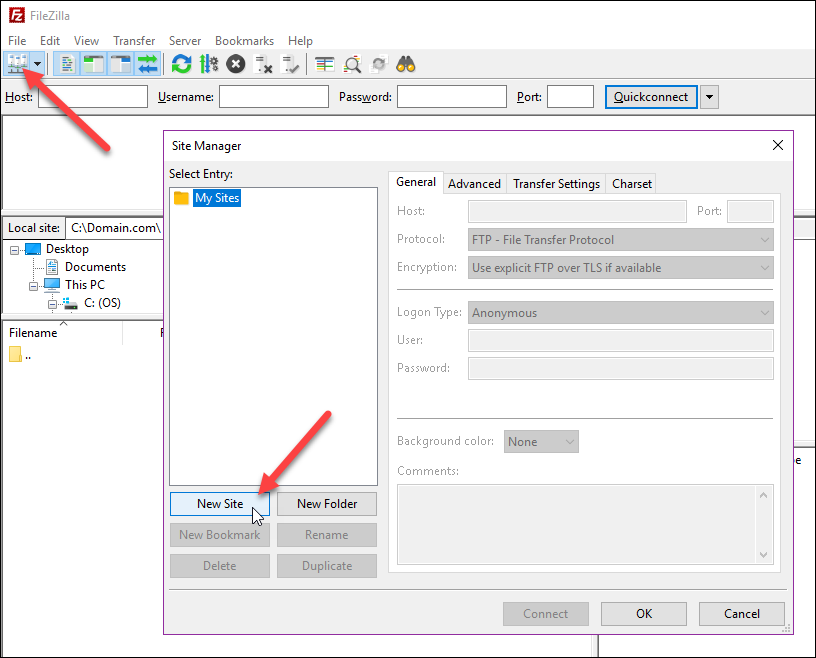
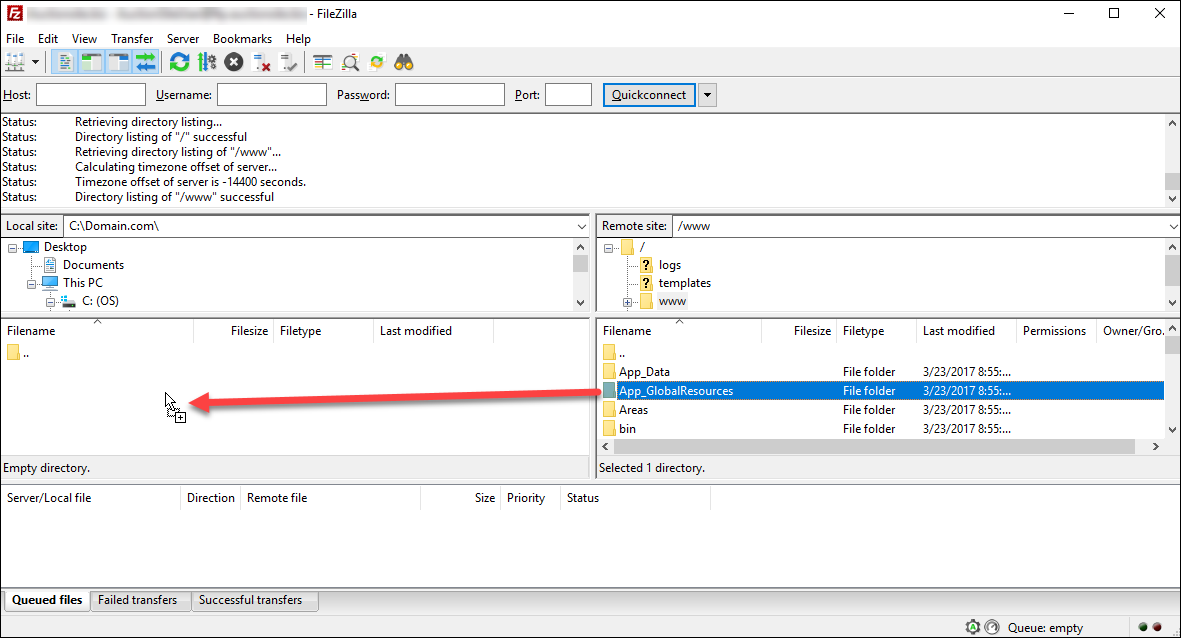
- Create a folder on your local computer for storing the files you download through the FTP client. Copy the App_GlobalResources folder from the webroot to your local machine.
Naming the Files
Now that the resx files have been copied to your local computer, you are ready to make changes. Renaming the files in a specific manor will allow the AuctionWorx system to differentiate between the default values and the translated version of them. This tutorial will use Spanish as the example language.
Note: "es" is used in the file name because AuctionWorx uses the Microsoft .NET language codes to identify what resource files pertain to what language. For a list of the .NET language codes please visit: https://msdn.microsoft.com/en-us/library/ee825488(v=cs.20).aspx
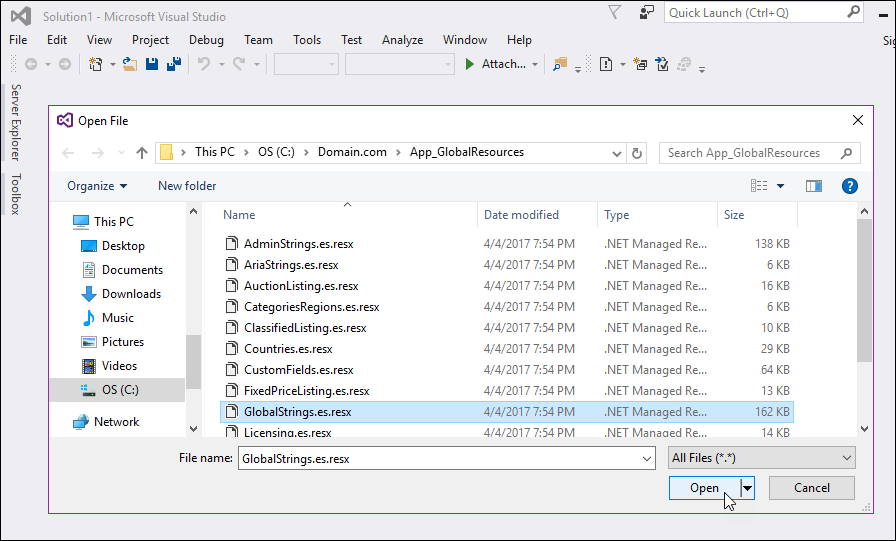
- Open the App_GlobalResources folder with a file explorer and rename the "AdminStrings.resx" file to "AdminStrings.es.resx".
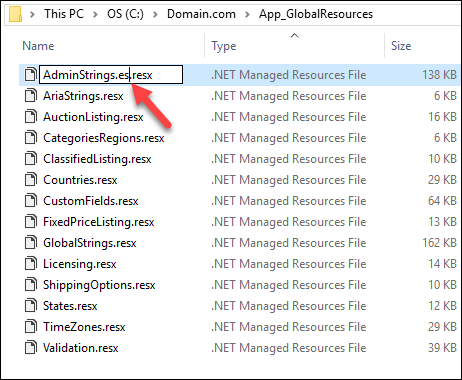
- Rename the rest of the files with the same extension.
{Name}.{language code}.resx
Editing a Resx File
Resx files are proprietary Microsoft language resource files and the best editor for this job is Microsoft Visual Studio.
Note: Visual Studio Community Edition is free and there are numerous resources available to assist with troubleshooting issues if you should have any. To download Microsoft Visual Community Edition visit: https://www.visualstudio.com/downloads
- Open the GlobalStrings.es.resx file in Visual Studio.
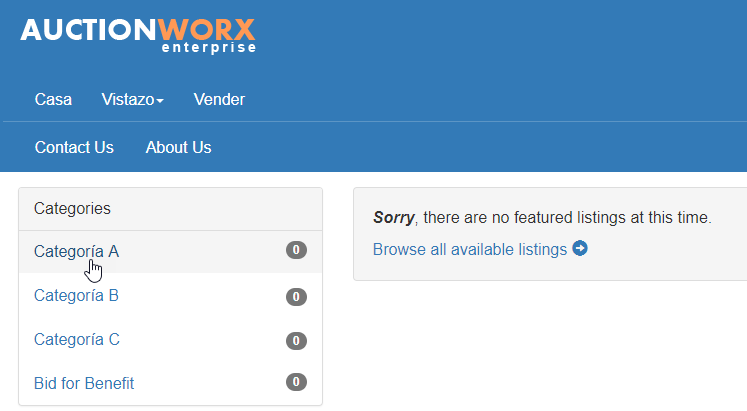
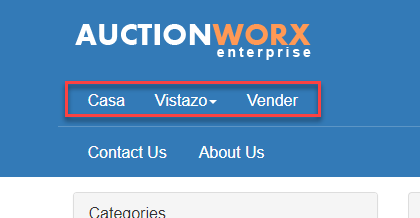
- Scroll down to find the Name "Home" and change the Value to "Casa".

- Change the Name "Browse" to have a value of "Vistazo" and "Sell" to "Vender".
- Save the file and close Visual Studio.
Upload the Translated Files to the Server
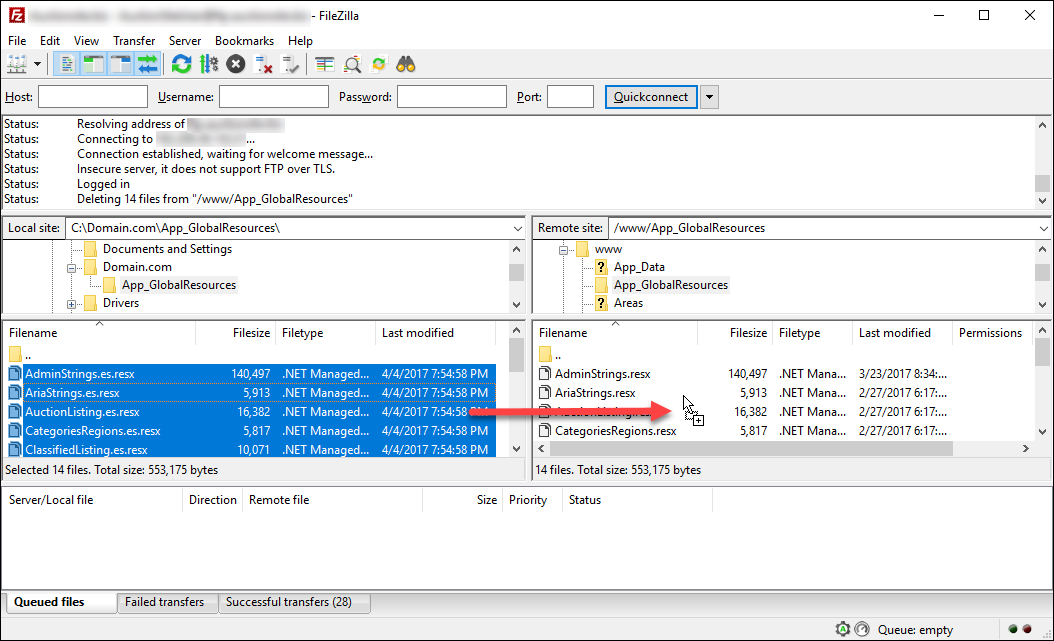
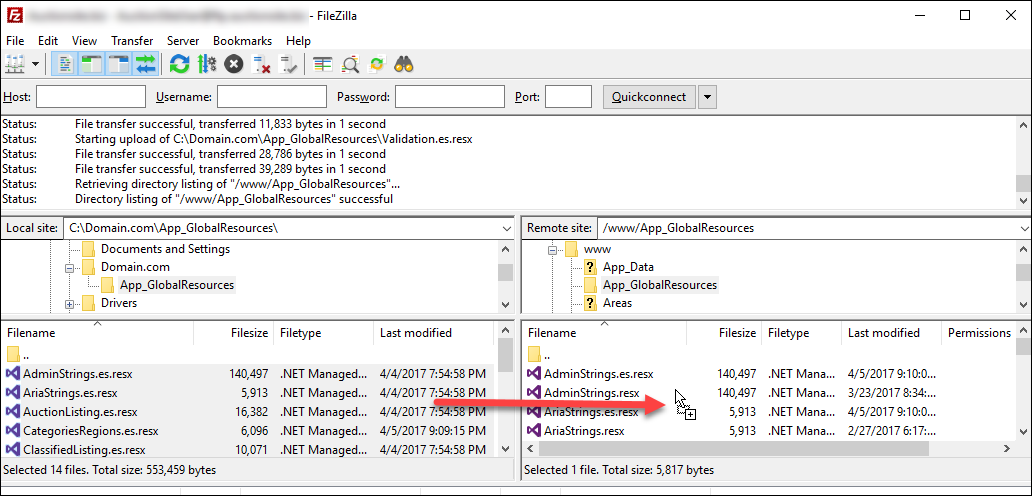
- Open FileZilla and connect to your server.
- Navigate in the left panel to the local App_GlobalResources folder showing the .es.resx files and navigate the right panel to the corresponding folder on the server.
Applying the Changes in the Admin Control Panel
- Open your site in a browser, login as the admin and open the Admin Control Panel.
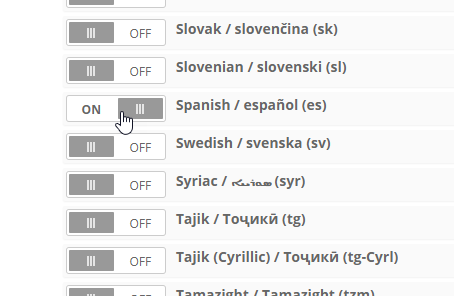
- Navigate to Admin Control Panel > International > Languages and turn on the Spanish option, then click Save.
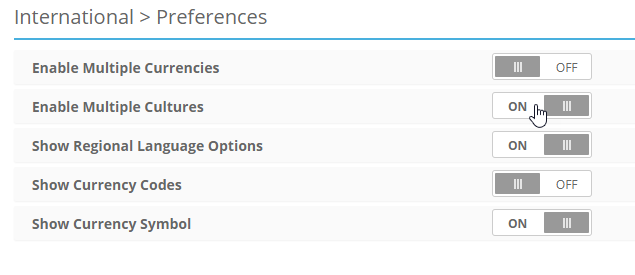
- Navigate to Admin Control Panel > International > Preferences and turn on the Enable Multiple Cultures option and click Save.
- Go back to the Home page and change the Culture option in the footer to Espanol, then click Update to test that everything worked.
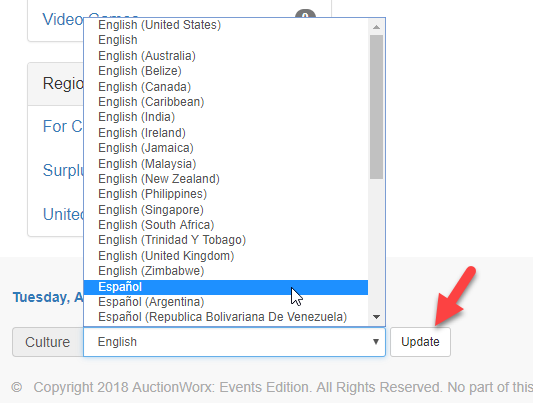
- Check the result by reloading the page. (It should take a moment once the system realizes it has a new library of resources.)
Translating Categories
Using the same method, translating the category names is only slightly different. The Name/Value pairs are not added to the CategoriesRegions.resx files by default. The system will check the resx file first but, if the system does not find the Name/Value pair in the resx file it will look to the database for the correct phrase to output to the site.
- Open a category to view the listings in that category.
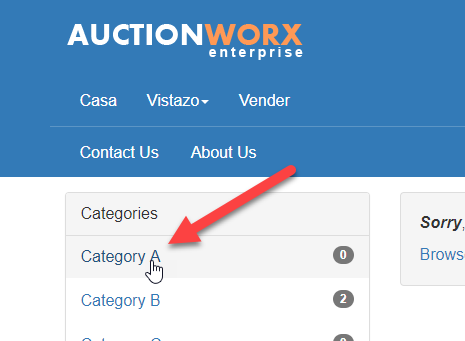
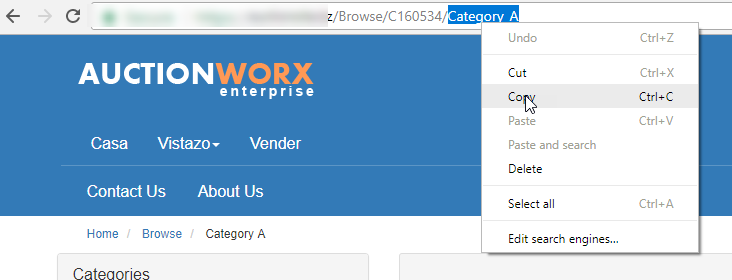
- On the Category A page you will see the system's name for that category at the end of the URL. Copy the category name from the last part of the URL.
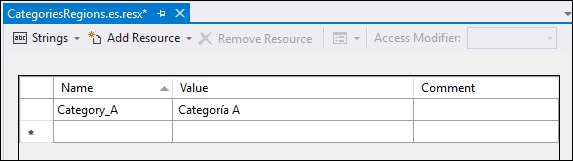
- Open your local version of the CategoriesRegions.es.resx file in Visual Studio.

- Click the Add Resource dropdown arrow and select Add New String.

- Paste the last part of the URL into the Name column where String1 is. Enter "Categoría A" in the Value column for this row.
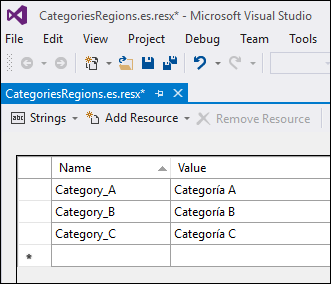
- Now, do the same process with Category B and Category C. Open the page, get the name from the URL, add new strings, enter Spanish values and save the file.
- Now open the FTP client and copy the files from the local App_GlobalResources folder to the live folder. You should get a warning that you are overwriting the CategoriesRegions.es.resx file. Click OK.
- Refresh the Home page and the categories should now be updated.