Tutorial: Import CSV
This tutorial provides examples of importing Lots into an Event on AuctionWorx using the Import CSV feature.
The Import CSV feature allows the site administrator to import many listings into the system at once. The starting point for this tutorial is a fresh installation of AuctionWorx Events Edition with the default settings.
Sections in this Tutorial
Create the Event and Identify the Category
Note: Third party software, Microsoft Excel and the FileZilla FTP Client, are used in this tutorial. These specific programs are not required for CSV imports – any comparable applications can be used.
An Overview of the Process
This tutorial will go over the steps used to import a Lot with all the information needed to publish the Event. For specific information about the buttons and settings used in this tutorial, See: Admin Control Panel > Auctions > Import CSV
The first thing you should look at when getting started is the CSV Import Help dialogue box.
The data in this table can be used to provide some insight into, what the syntax should look like when it is entered into the CSV Template.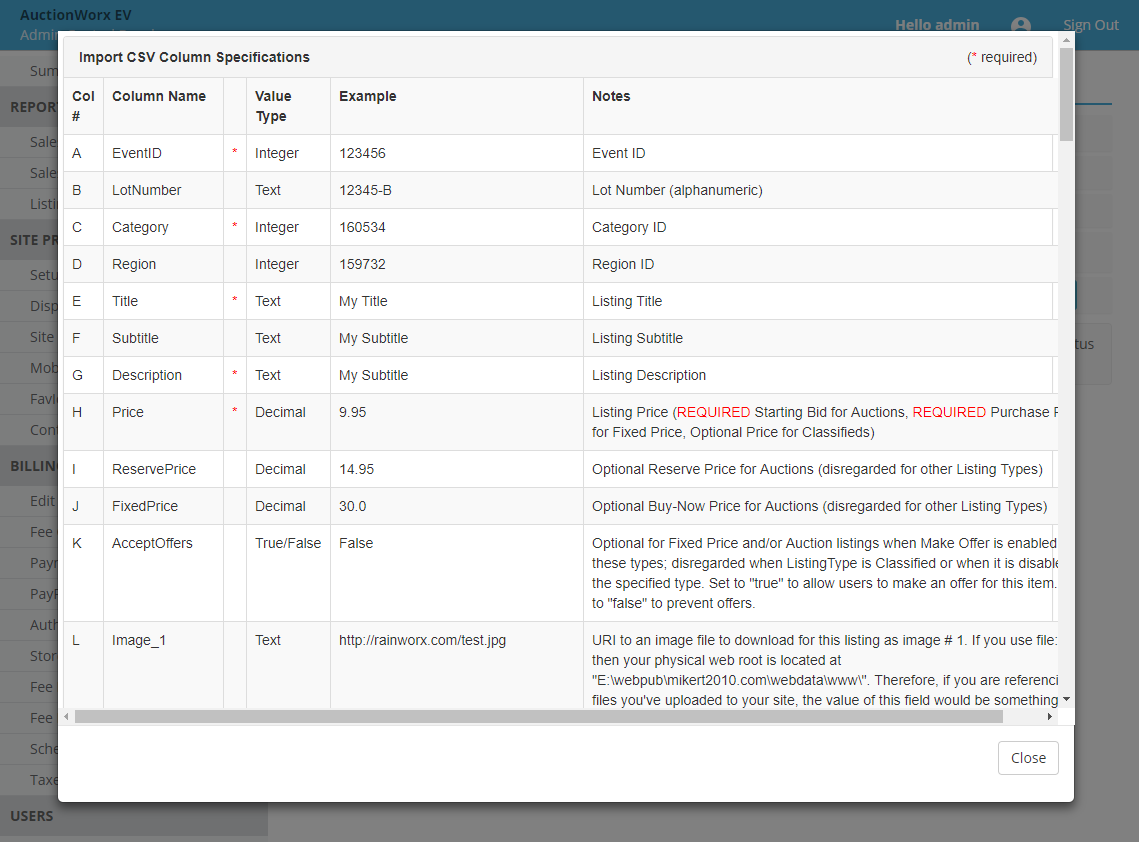
Create the Event and Identify the Category
- Login in as the seller.
- Click Create Event from the Manage Auctions dropdown.
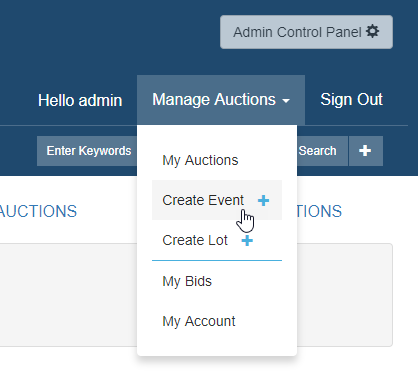
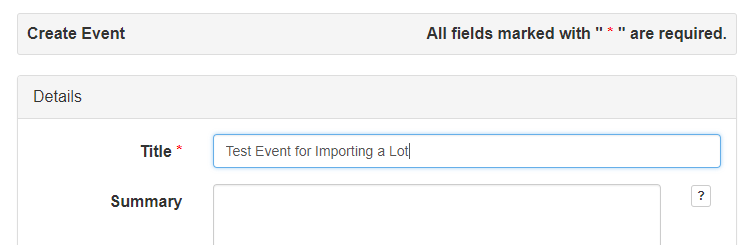
- Enter only the required information, Title, Start Time and End Time, for this event. Then click Create Event.
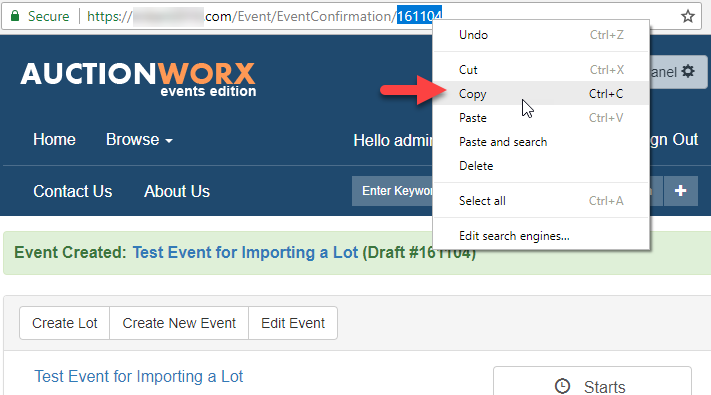
- On the Event Confirmation page, copy the Event ID from the URL. Paste this number in your notes.
- Click the Admin Control Panel button and navigate to the Categories > Edit page.
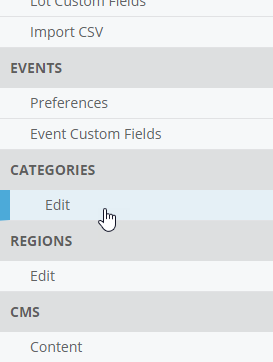
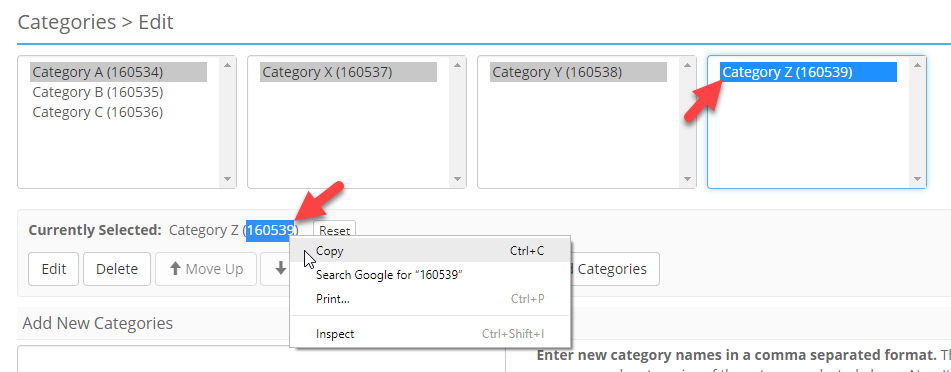
- On the Categories > Edit page, select the Category from the list making sure that you are selecting the last category or a Leaf Level Category. Copy and paste this Category ID in your notes.
Download the Template
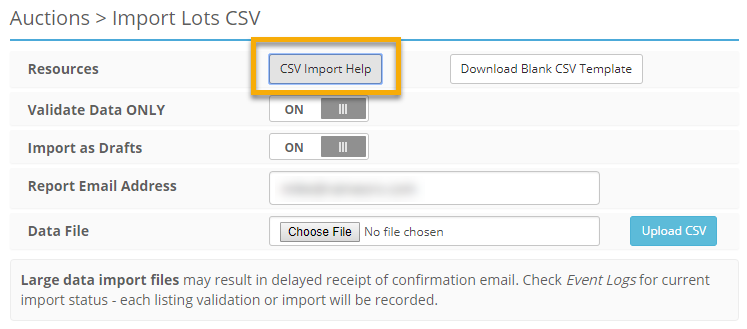
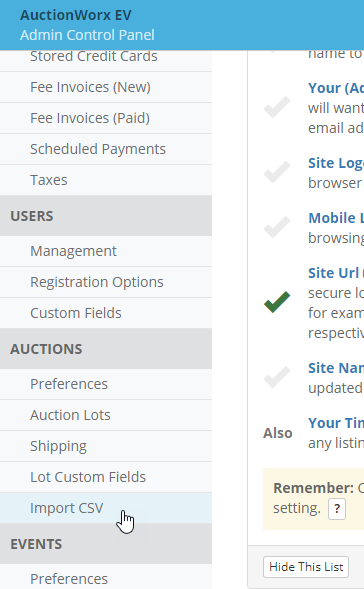
- Navigate to the Admin Control Panel > Auctions > Import CSV page.
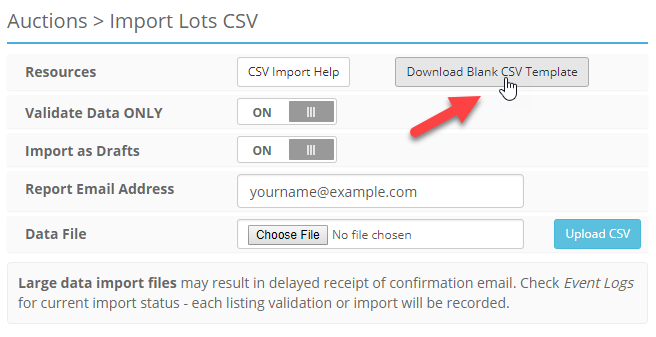
- Click on the Download Blank CSV Template button.
Fill In a Basic Lot
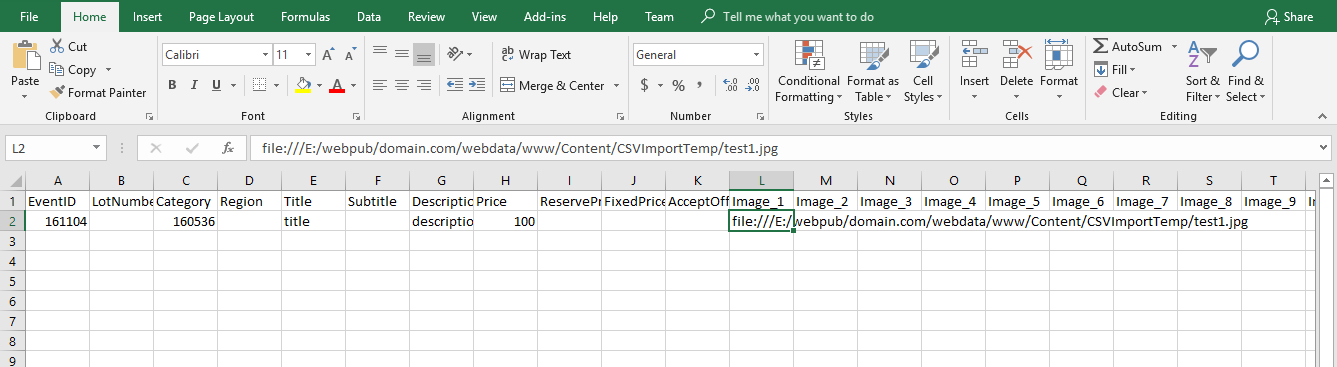
- Open the CSV Import Template (with Microsoft Excel or Google Sheets) and paste the Event ID in the second cell in the first column.
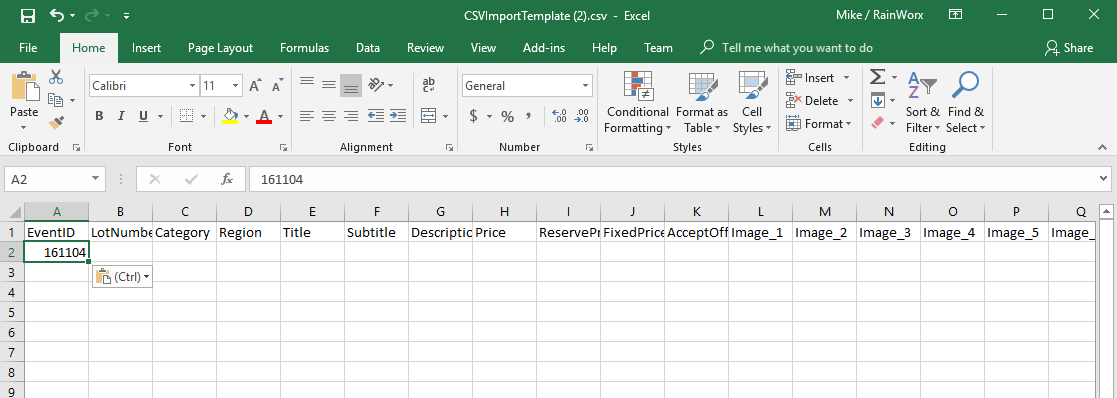
- On Row 2, Column C, paste in the Category ID number.

- On that same row, enter a Title, a Description and a Price in the appropriate columns.
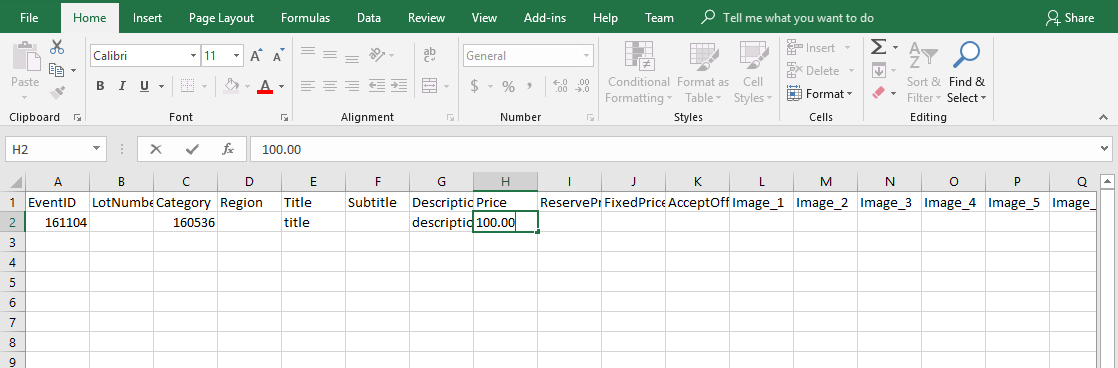
- Save the file.
Uploading Images
The Image field is not required but images are important to any Listing. The images need to be online so the system can access them with a URI. This URI can either point to a location on the internet where the image is hosted or it can point to a location on the server that is hosting the site. Using an FTP client like FileZilla will allow you to upload the images that will be referenced in the CSV file.
Note: The shared link for Dropbox images may contain “?dl=0” at the end of the URI. These links will not be imported and will be flagged by the validator. Replace the “?dl=0” with “?raw=1” to import Dropbox images.
Install FileZilla
FileZilla is the FTP software that we are going to reference in this tutorial because it is a good free option.
FileZilla download page: https://filezilla-project.org/download.php
Note: Follow the steps in the wizard that are appropriate for your computer and operating system.
Connect to your Server and Upload the Images
The images we will be uploading will only be used during the CSV Import process. This folder will need to be placed in the Content folder on the server. The import process will create copies of the images to be used throughout the site. After the Listings have been imported, the images should be deleted to conserve space on the server. This is why the folder being moved is named CSVImportTemp, so it can be easily identified when the import is finished to delete or move off the server.
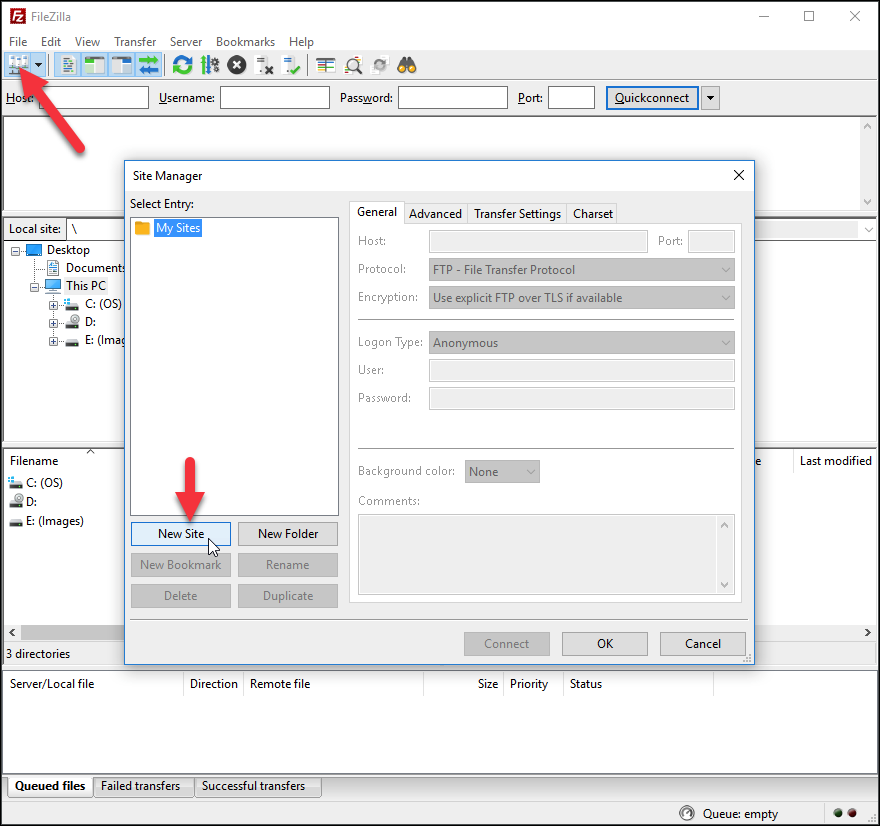
- Open FileZilla.
- Click on the Site Manager button in the top left of the window, then click New Site.
-
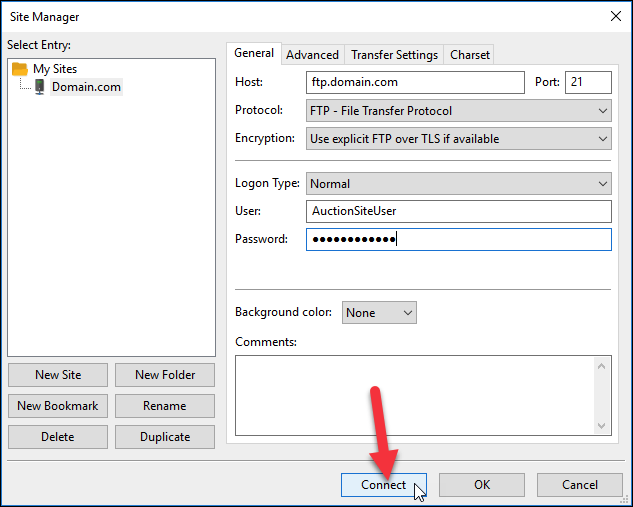
Enter the FTP Access information you received from RainWorx when your hosting was setup, otherwise get your FTP access information from your web hosting provider. Enter the following information on the General tab.
- Host - ftp.domain.com
- Port - 21
- Protocol - FTP (File Transfer Protocol)
- Encryption - "Use explicit FTP over TLS if available"
- Logon Type - Normal
- User - [provided username]
- Password - [provided password]
- After entering the information into the Site Manager, click the Connect button at the bottom of the Site Managerwindow.
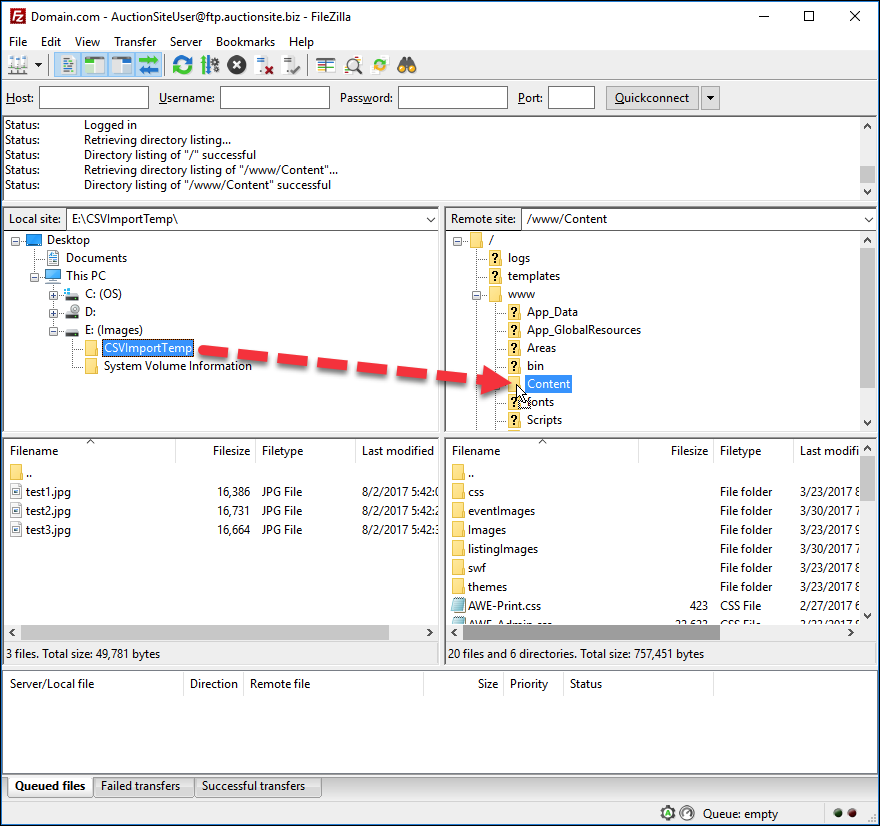
If everything was entered correctly you will see a Status message saying "Directory listing of "/" successful" - The window will show two file explorers on the left and right. The left side is your local computer's file system and the right side is the server's file system. Navigate the left side to show the CSVImportTemp folder and navigate the right side to show the Content folder.
- Drag and drop the CSVImportTemp folder from the left side onto the Content folder on the right side.
- You can now view the image you have uploaded in a browser by going to:
[your domain name]/content/CSVImportTemp/[filename]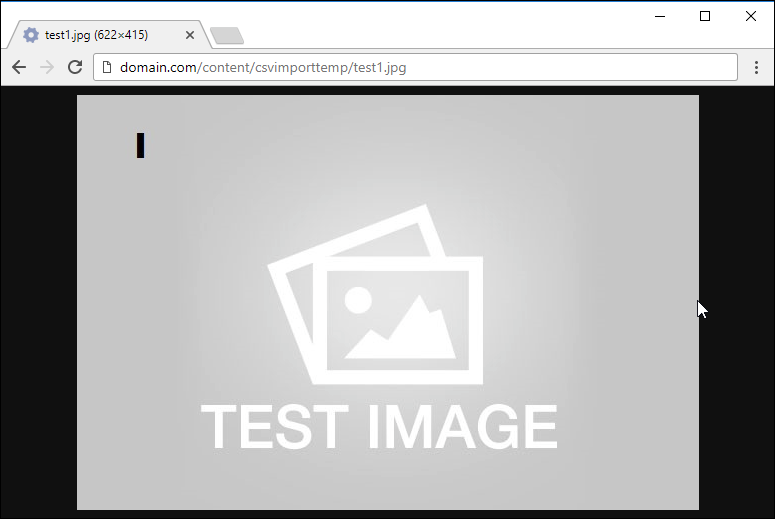
Identify the Image URIs
The most efficient way to reference these images is by pointing to the file location and not the web address. You could just reference the web address described above but, with large batches of Listings it makes more sense to point to them directly.
- Logged in as an admin, navigate to the Admin Control Panel > Listings > Import CSV page and click the CSV Import Help button.
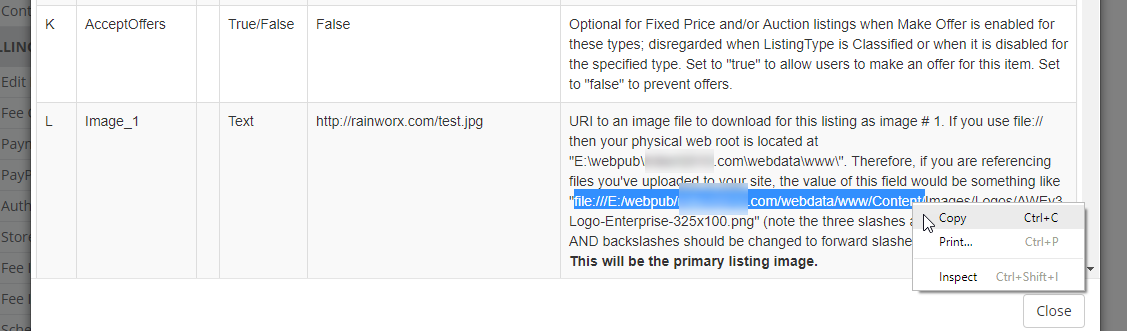
- In the notes for the field named Image_1 you will see a reference to the file path your server uses. This is automatically generated using the settings on your site to describe what the URI should look like.
Note: This will be different for each site based on how the server is setup so, do not rely on the example given below. Go by what it says in the CSV Import Help notes.
Example: file:///E:/webpub/domain.com/webdata/www/Content/CSVImportTemp/test1.jpg
The Import Process
Once you have a CSV template filled in, you can import the listings on that CSV file.
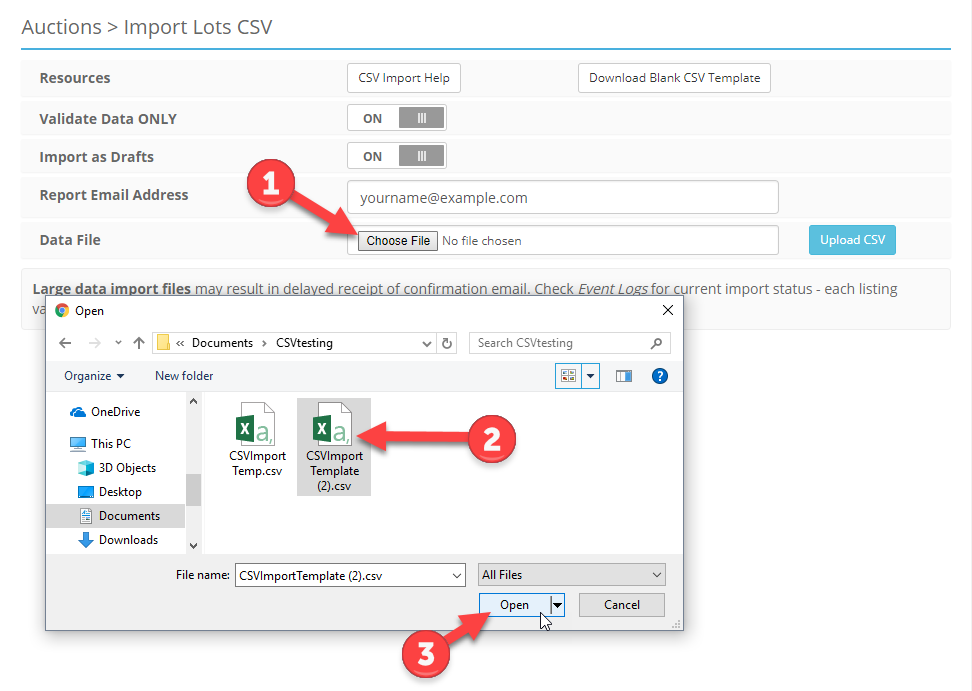
- Navigate to the Admin Control Panel > Auctions > Import CSV page.
- Click the Choose File button on the Data File field and select the CSV Template file that you have been using and click Open.
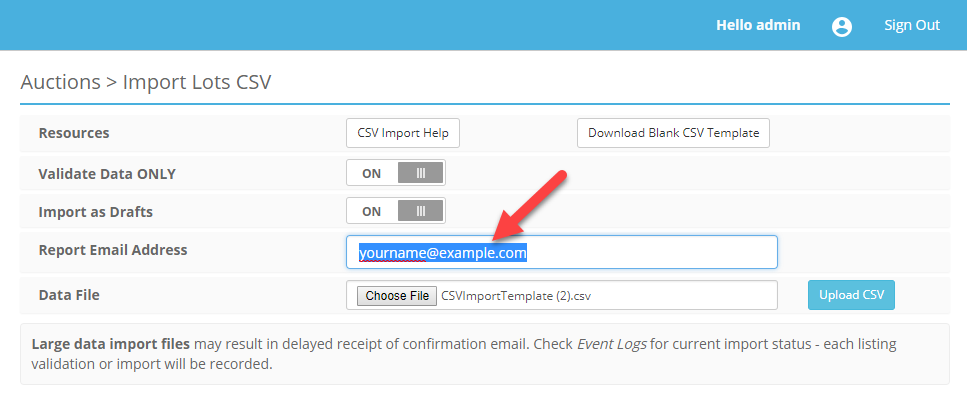
- Make sure that your email address is entered into the Report Email Address field.
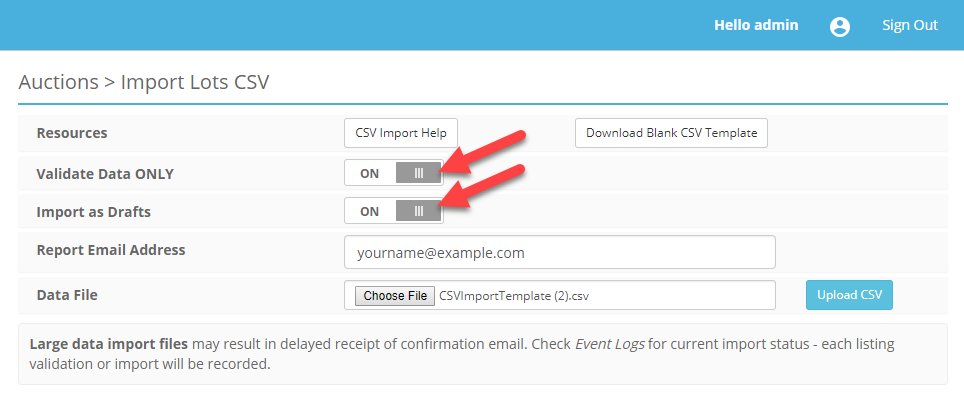
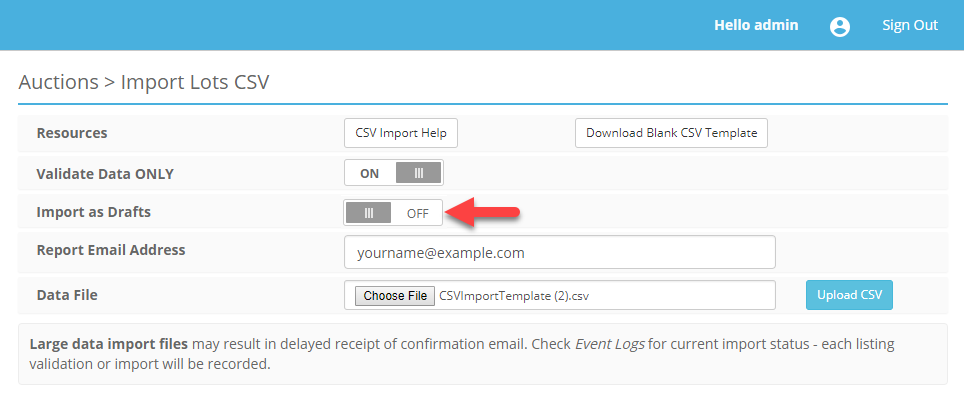
- Make sure that the Validate Data ONLY and the Import as Drafts settings are both enabled. The Validate Data ONLY setting is going to keep this data from actually being added to the site while we are in the testing phase. The Import as Drafts setting is going to lower the bar so the system will only require the three primary fields, Event ID, Category ID and Title.
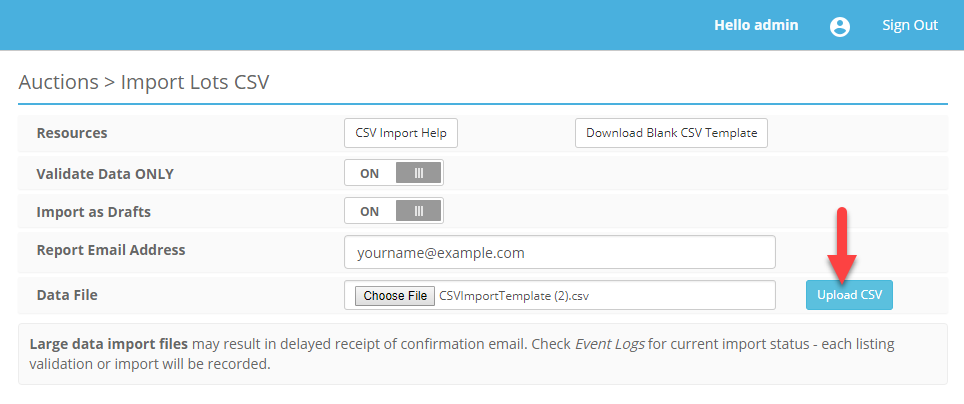
- Now, click the Upload CSV button.
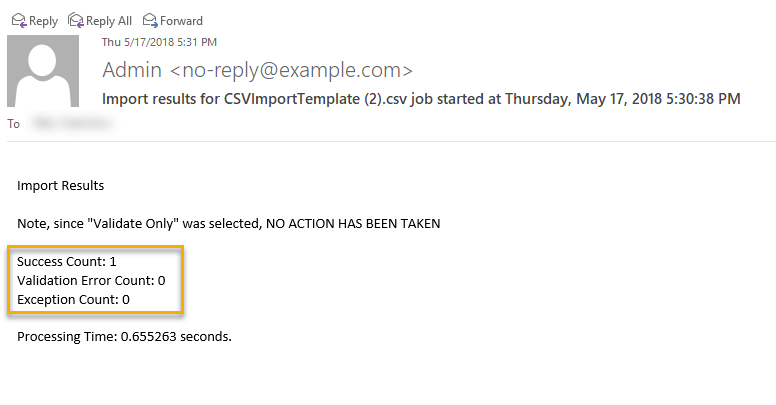
- You should receive an email that says "Success Count: 1" and "Validation Error Count: 0".
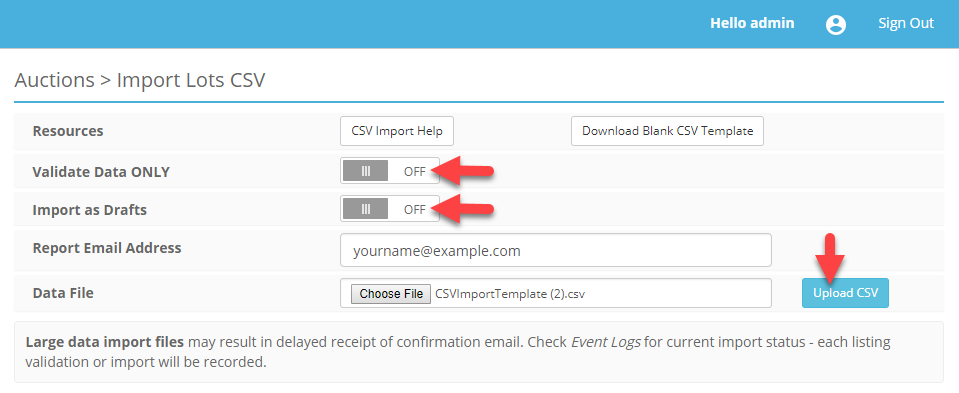
- Enter all of the same information into the Import CSV page, except this time, turn off the Import as Drafts setting and click the Upload CSV button.
- The next email you receive should look the same. This time the system validated the three required fields for a Draft Lot but, it also validated the Price and Image fields. It is good to introduce the fields in stages. If something goes wrong, there are fewer things to you'll have to review.
- Finally, since the validation process went through with no Validation Errors, and no Exceptions, it is now safe to turn off the Validate Data ONLY setting. Both the Import as Drafts and the Validate Data ONLY settings should be off but everything else should look the same. Click Upload CSV.
The last email you receive should look like this: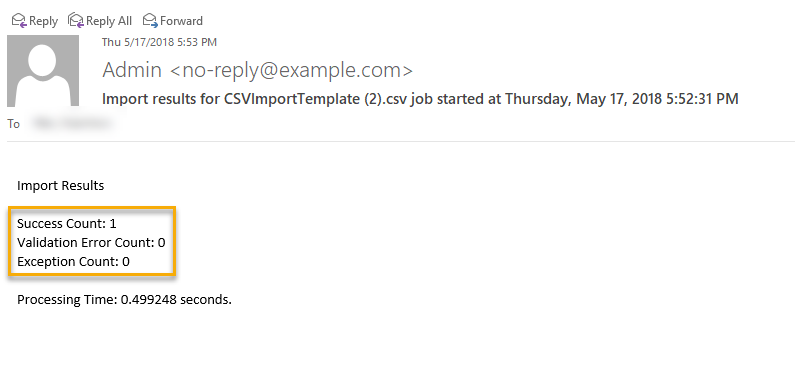
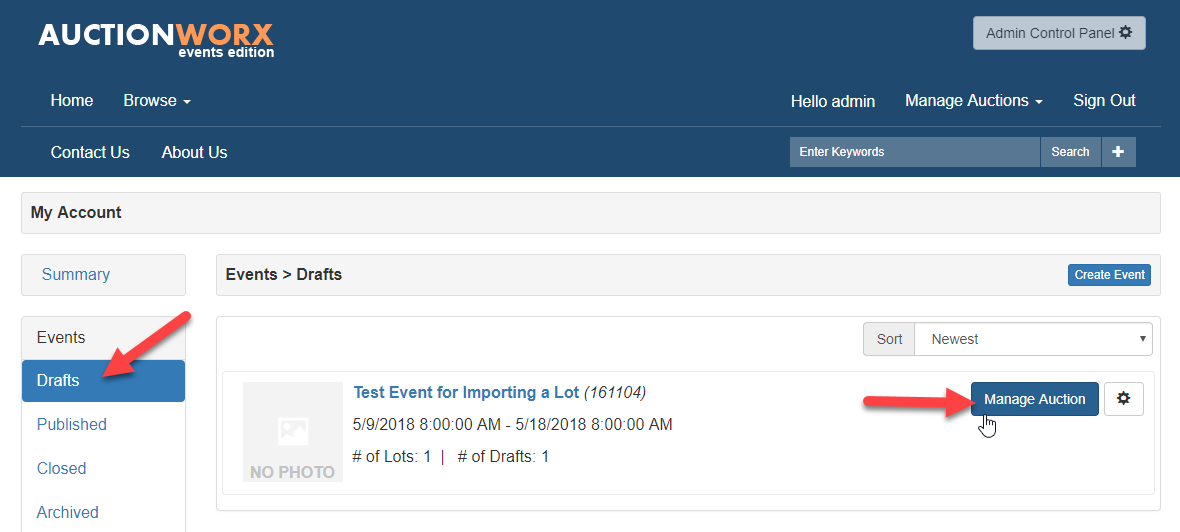
- Check to see if the listing has been added to the event we created. Navigate to My Account > Events > Drafts and click the Manage Auction button next to the Test Event for Importing a Lot.
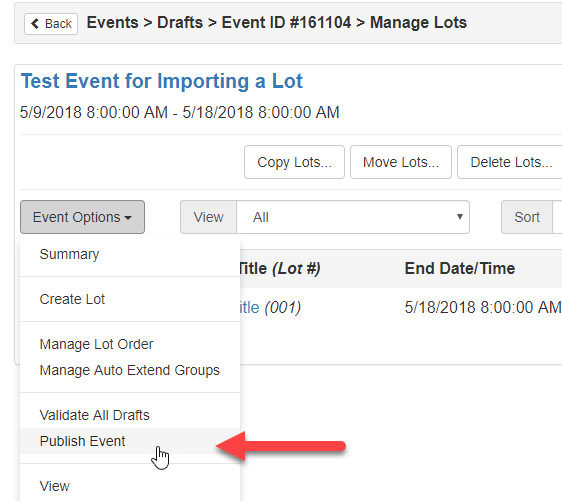
Publishing the Event and Lot
The reason we are publishing the Event now just to finish our test. Of course, in a real world scenario you would upload many Lots and populate additional fields before publishing everything. Getting an email template with the basic fields verified as working is really just the starting point. Adding more Lots in stages will give you the opportunity to identify issues as they are introduced to the file.
- From the Manage Lots page, click the Event Options dropdown and select the Publish Event option.
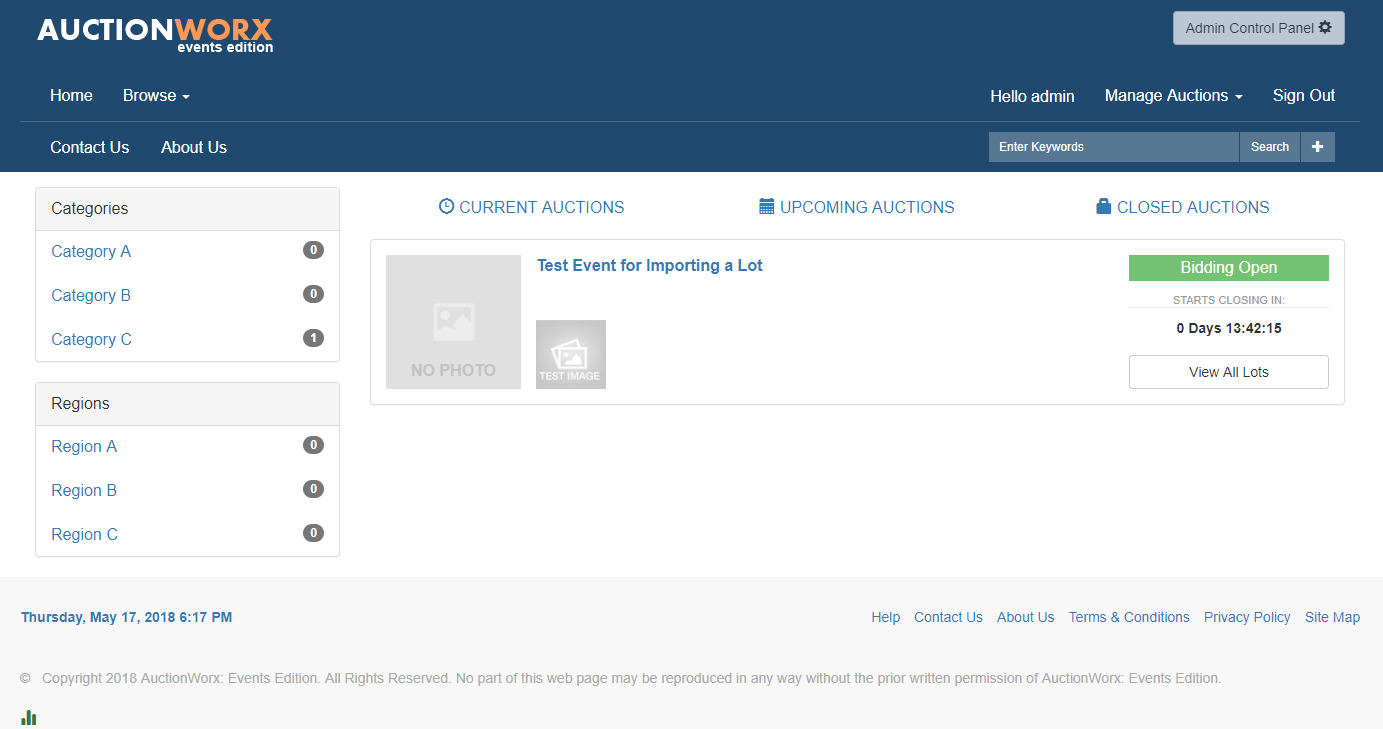
Now your Event and the Lot you imported are published to the site. At this point, all users can view the Event. Navigate to the Home page to view the published Event.