Setting Up Consignors for a Single Seller Site
This tutorial assumes the site is running AuctionWorx Events Edition and the site owner is the only seller.
Sections in this tutorial
- Initial Setup
- Setting Up Your Default Consignment Fees
- Adding Your First Consignor
- Adding a Consignor to an Event
- Adding a Consignor to a Lot
- Editing a Consignor Statement
- Emailing a Statement
Initial Setup
- To enable Consignors, navigate to the Admin Control Panel > Site Preferences > Setup page and turn on Enable Consignors.
- Navigate to the Admin Control Panel > Consignment > Preferences page and turn on Global Consignor List.
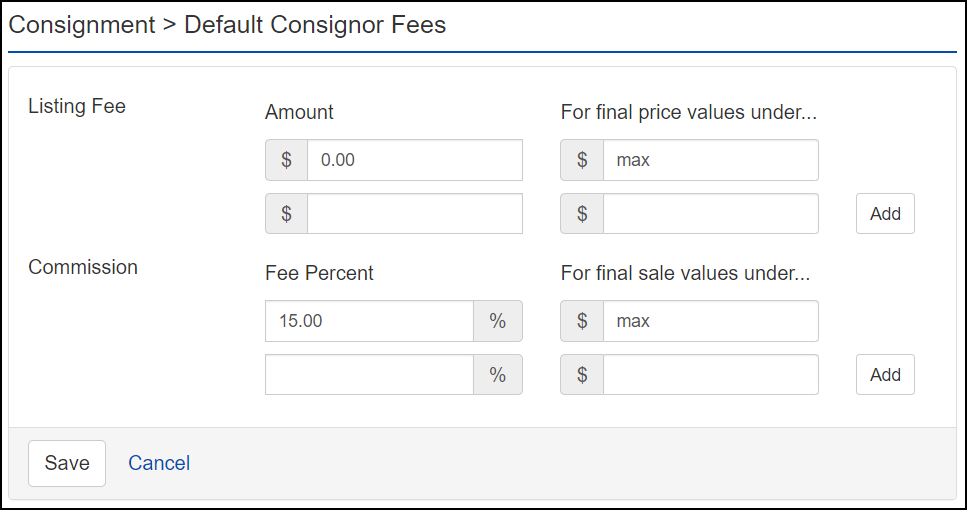
Setting Up Your Default Consignment Fees
- Navigate to the Admin Control Panel > Consignment > Consignor Fees page and enter the Fee Percent that you would normally charge as a Commission to a Consignor.
Example
If your standard Commission is 15% and no Listing Fee is charged, your Default Consignor Fees should look like this:
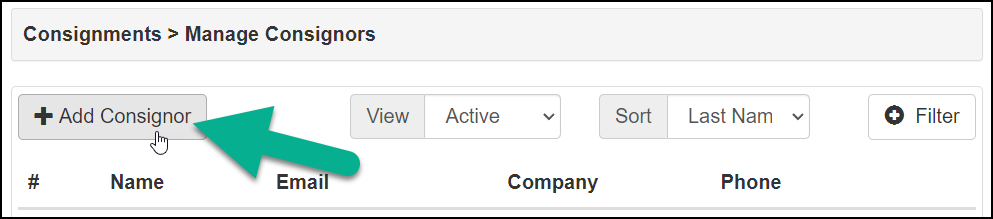
Adding Your First Consignor
-
Navigate to the My Account > Consignments > Manage Consignors page and click the Add Consignor button.
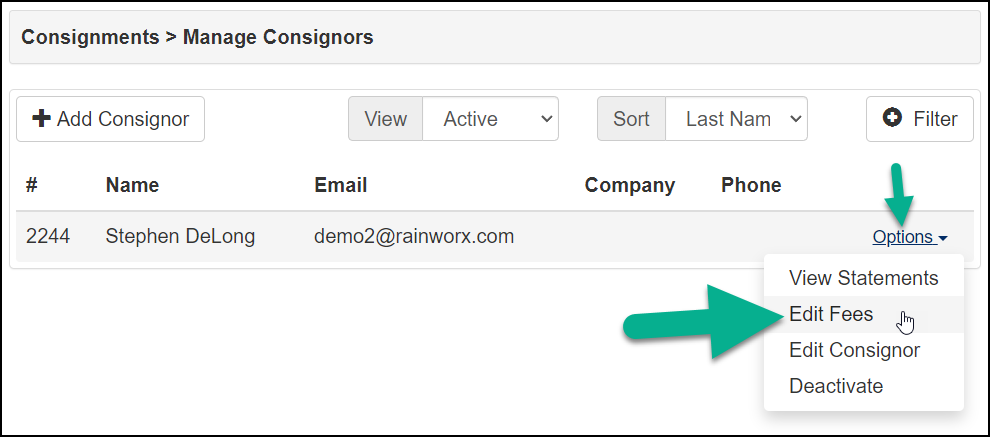
-
Update this form with the appropriate details to describe your Consignor, then click Save.
-
If you want to modify the Consignment Fee from the default for this Consignor, you can select Edit Fees from the Options dropdown next to the Consignor.
Adding a Consignor to an Event
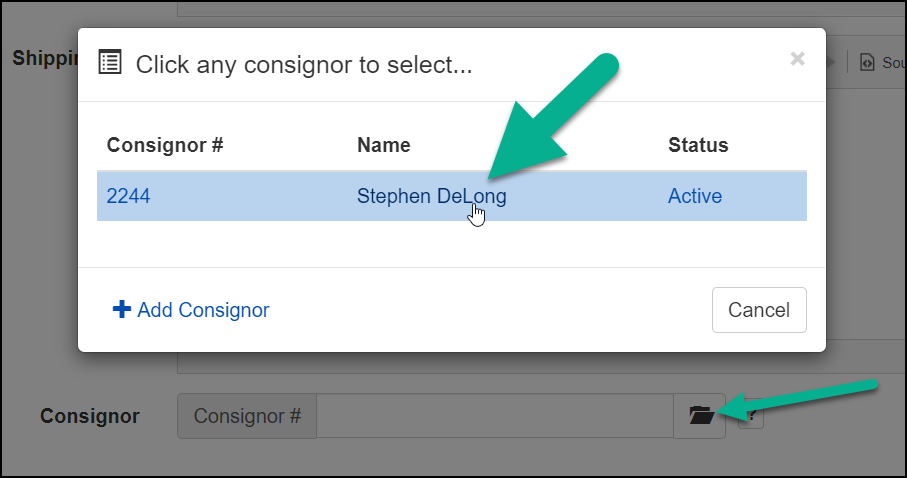
- Create the Event and on the Create Event form, click the folder icon next to the Consignor # field.
-
Then select the consignor you want applied to all lots in this event.
Note
You can remove this Consignor from select Lots in the Event or you can switch certain Lots to a different Consignor if needed.
Adding a Consignor to a Lot
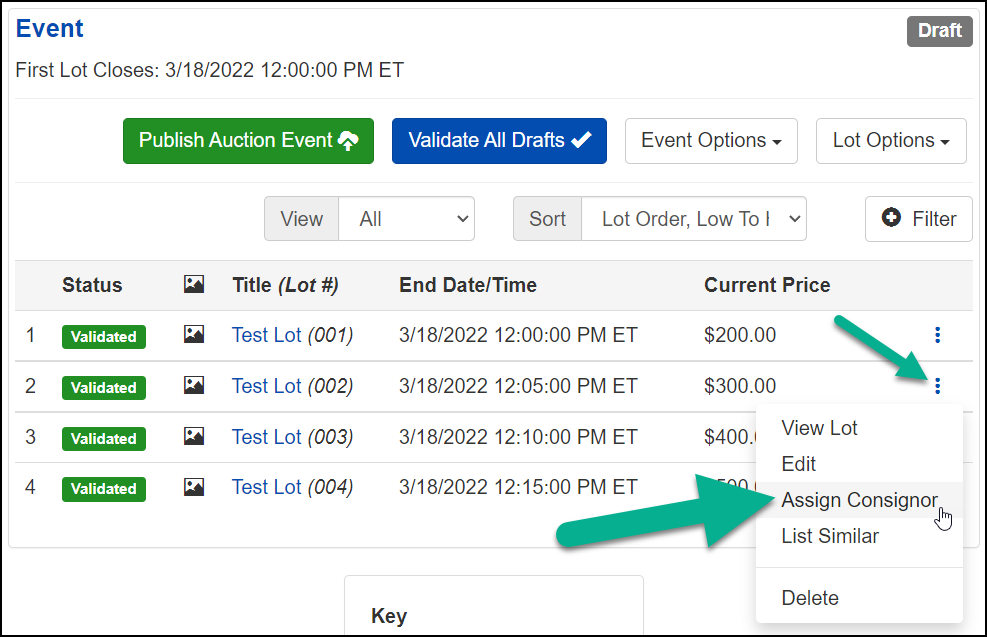
- Navigate to the Manage Auction page of the Event with a Lot that you want to assign to a Consignor.
-
Click the 3 dot menu next to the Lot that you want to add a Consignor to, then click Assign Consignor.
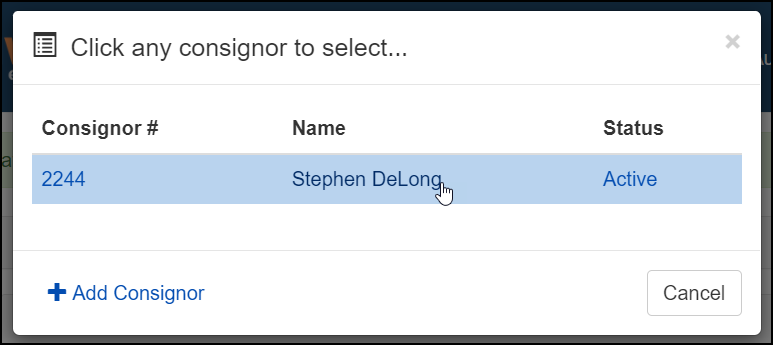
-
Choose the Consignor you want assigned to this Lot.
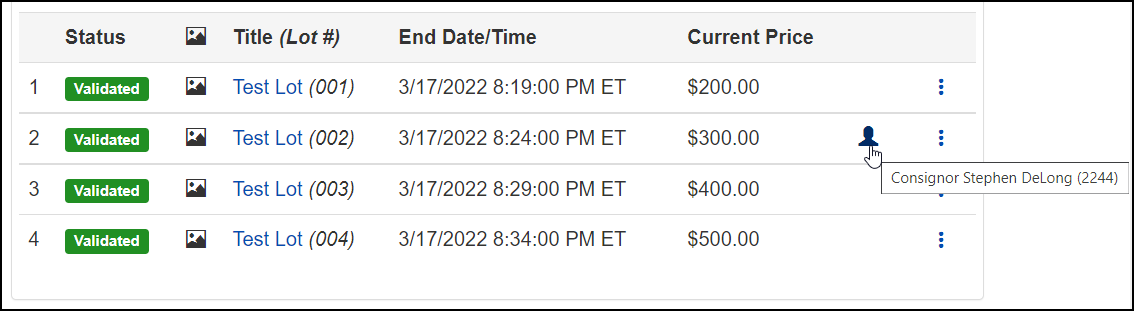
Note
After a Lot has a Consignor assigned, you'll see a Consignor Icon next to the Lot. Mousing over the Consignor Icon will show what consignor is assigned to that Lot.
Editing a Consignor Statement
Note
With Auto Generate Statements enabled, the Statement(s) will be generated after the Event closes. If not on, there is a Create All Statements button that can be found on the My Account > Consignments > Statements page.
- Once the Event has ended and the Statement has been generated, you can view the statement by navigating to the My Account > Consignments > Statements page.
- To view the statement, click the View button.
-
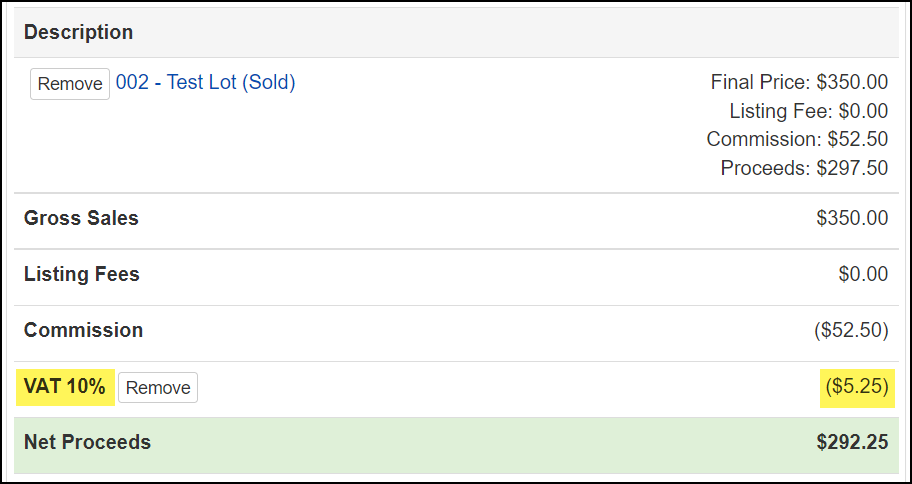
If adjustments to the statement are needed, you can update the description and amount fields and then click the Add button on the Adjustments row.
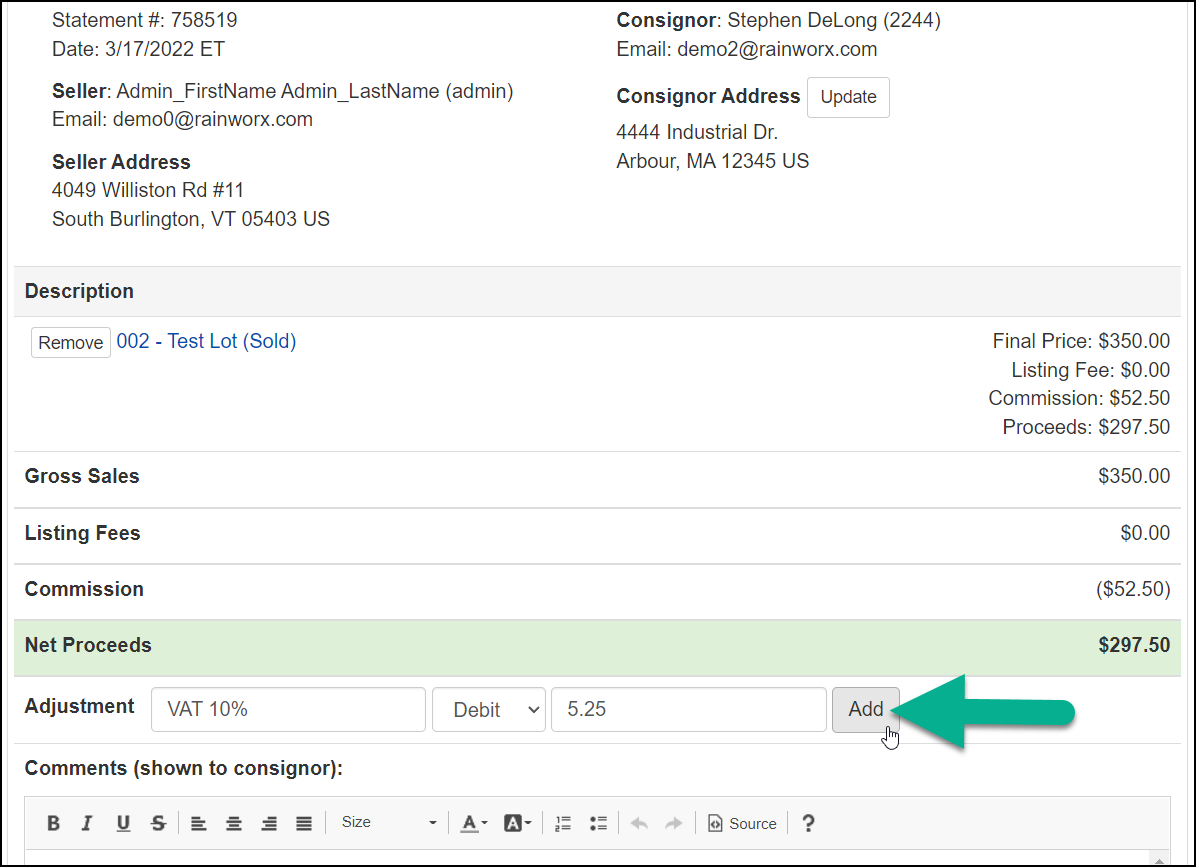
Note
The adjustment will be applied just above the Net Proceeds row.
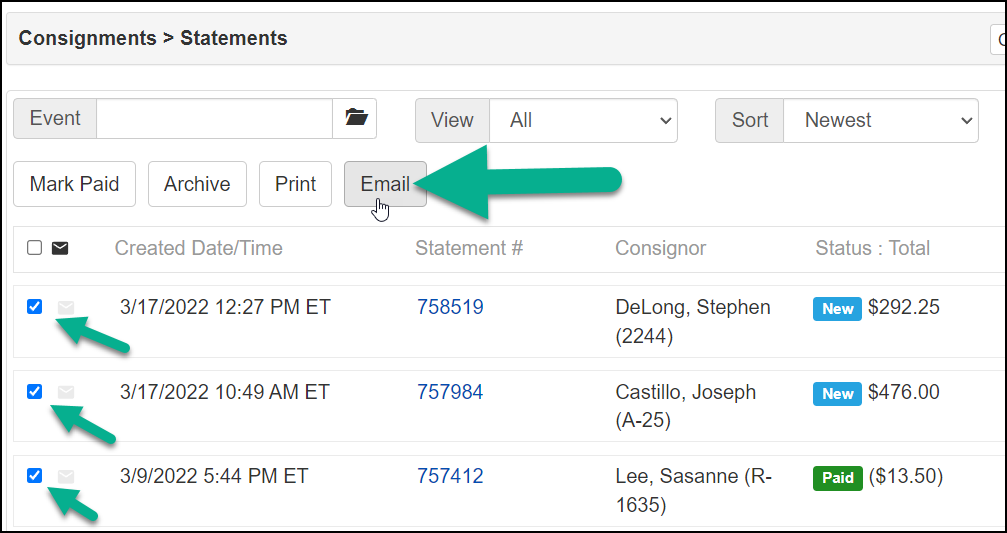
Emailing a Statement
-
At the top of the Statement, click the Email Statement button.
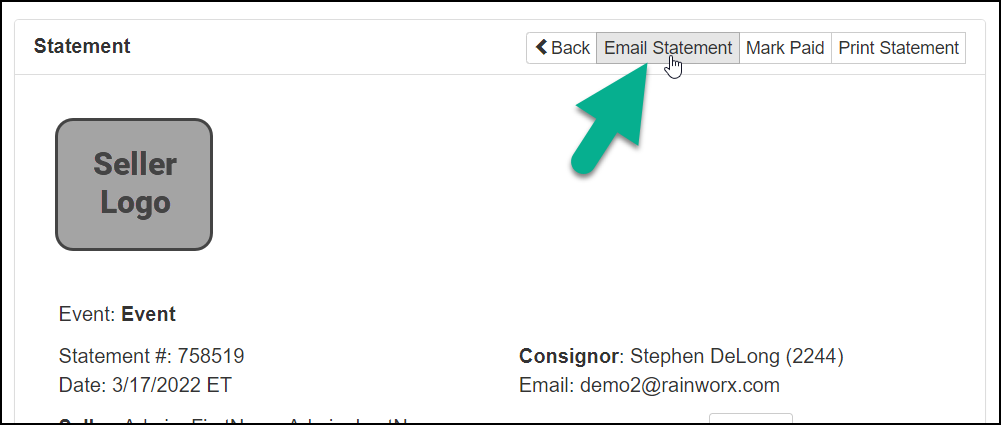
-
Alternatively, a group of statements can be emailed from the My Account > Consignments > Statements page.