Tutorial: Setting Up Stripe
This tutorial walks through setting up a Stripe account and connecting Stripe to AuctionWorx.
Stripe can be used to collect credit card payments in a number of ways in AuctionWorx, as just a way of paying a Site Fee Invoice or as a way for a Seller to collect payment on a Sales Invoice. This tutorial will go through the process for setting up Stripe for the Site Fees first and then to connect the service for a Seller. The process will allow the Site Owner to allow Sellers to connect their own Stripe account as well.
The tutorial is broken up into the following sections:
- Signing up for a Stripe account
- Setting up Stripe Connect
- Plugging in the API Keys
- Setting up Webhook Endpoints
After Stripe is setup, take a look at these configuration articles:
- Configuring Stripe as a Single Seller
- Configuring Stripe for Third Party Sellers
- Configuring Stripe for Site Fee Invoices
Signing up for a Stripe account
To begin, you'll need to setup a Stripe account and then you will be connecting your Stripe account to AuctionWorx.
-
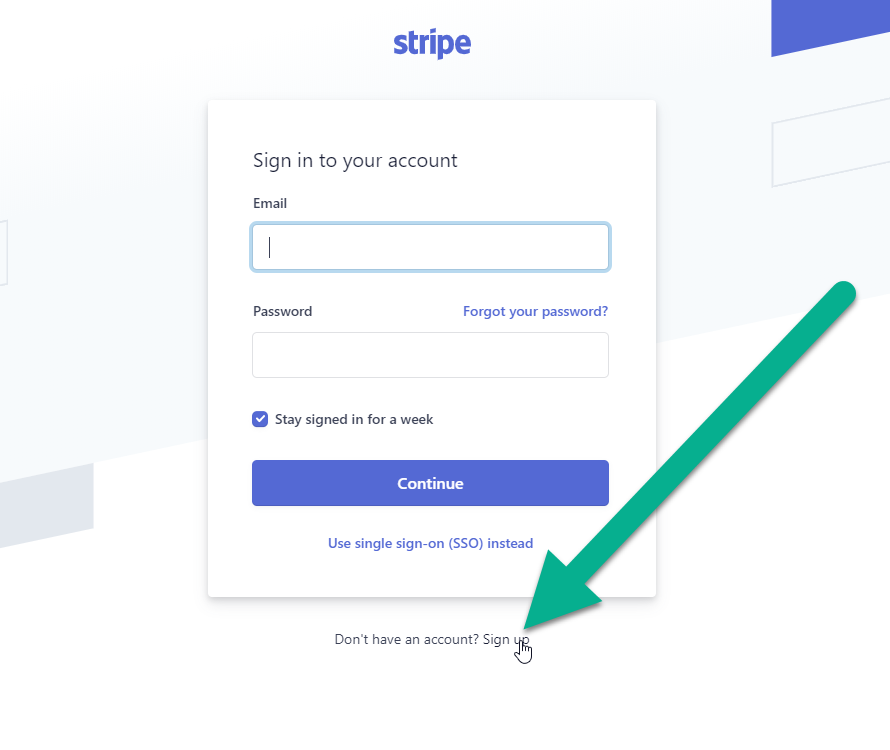
Go to Stripe.com and click Sign in , then click Sign up.

-
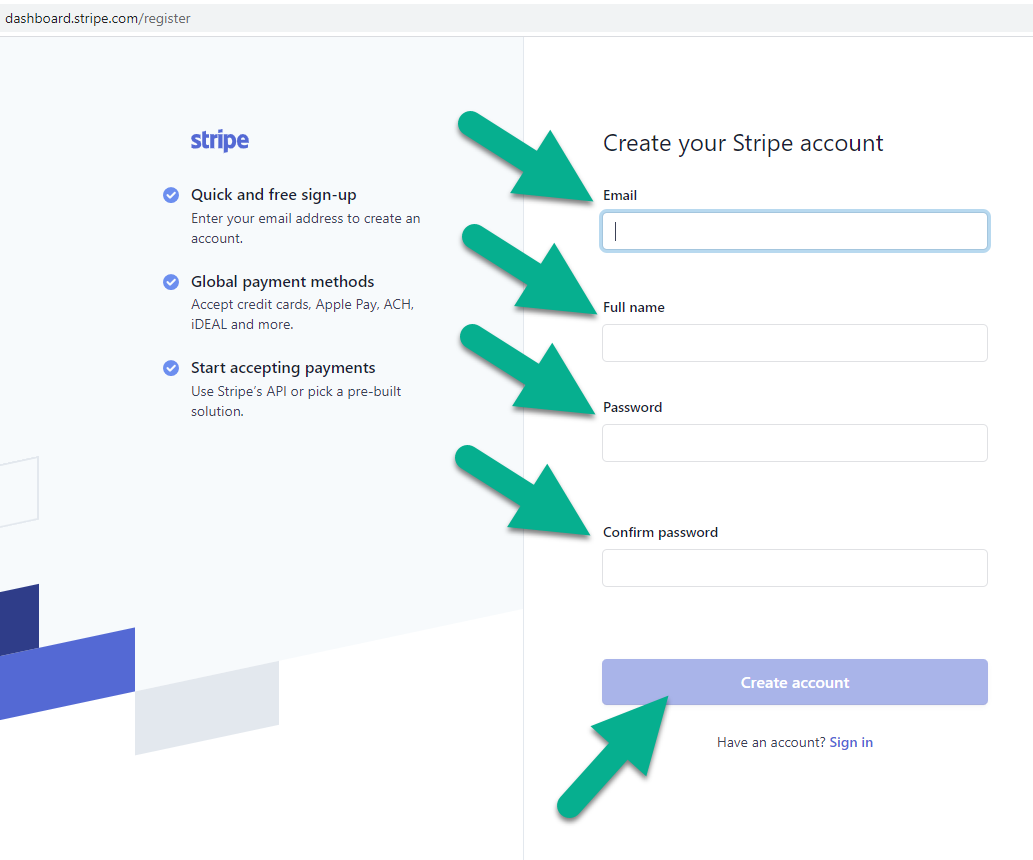
Fill in your Email, Full name and Password, then click Create account.
-
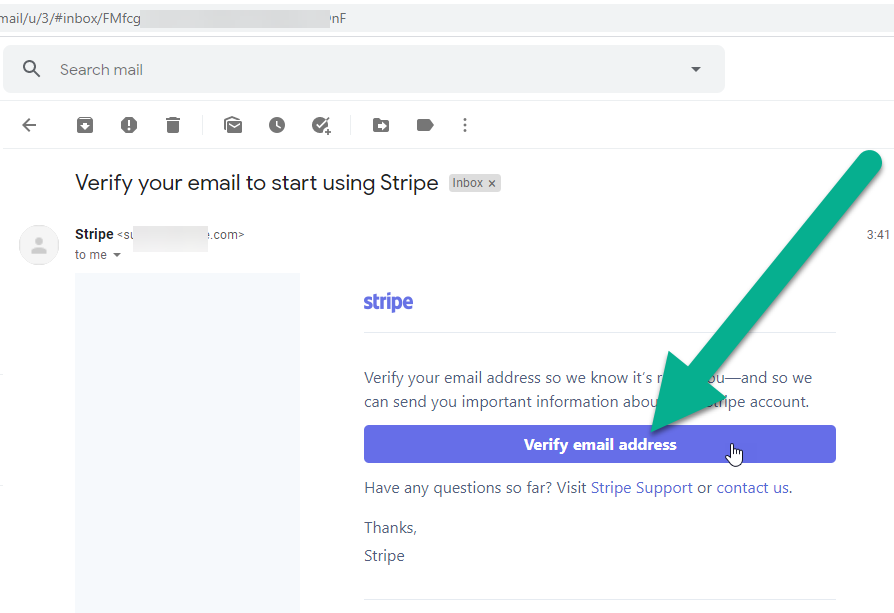
You should receive a verification email from Stripe. Click Verify email address.
-
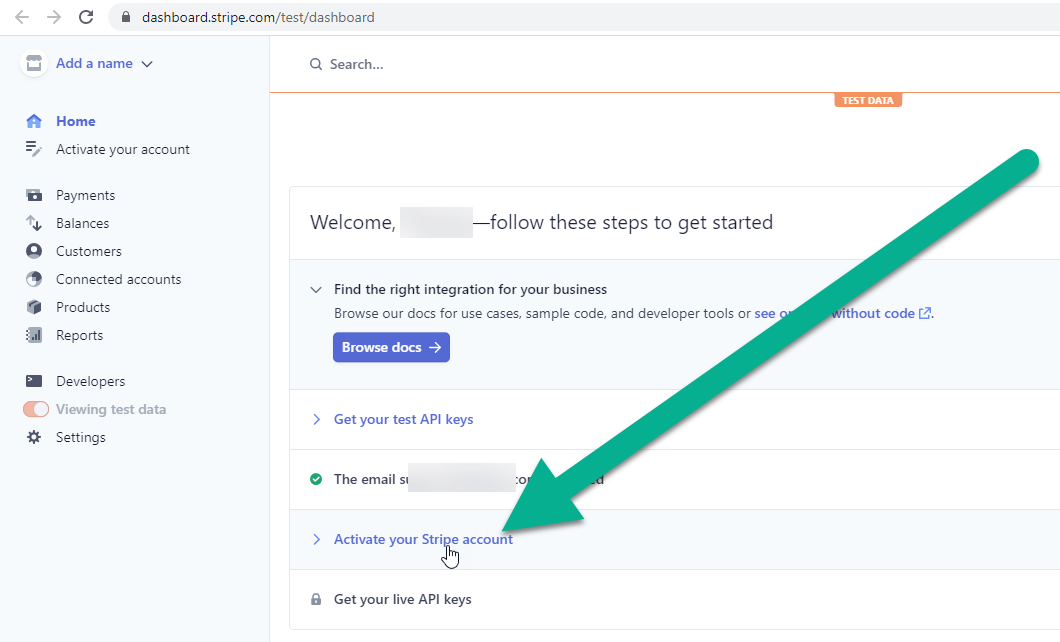
After verifying your email address, from the Stripe dashboard, click on Activate your Stripe account.
-
Enter your business address and select the business type. Use your personal billing address if your business does not have an official address.
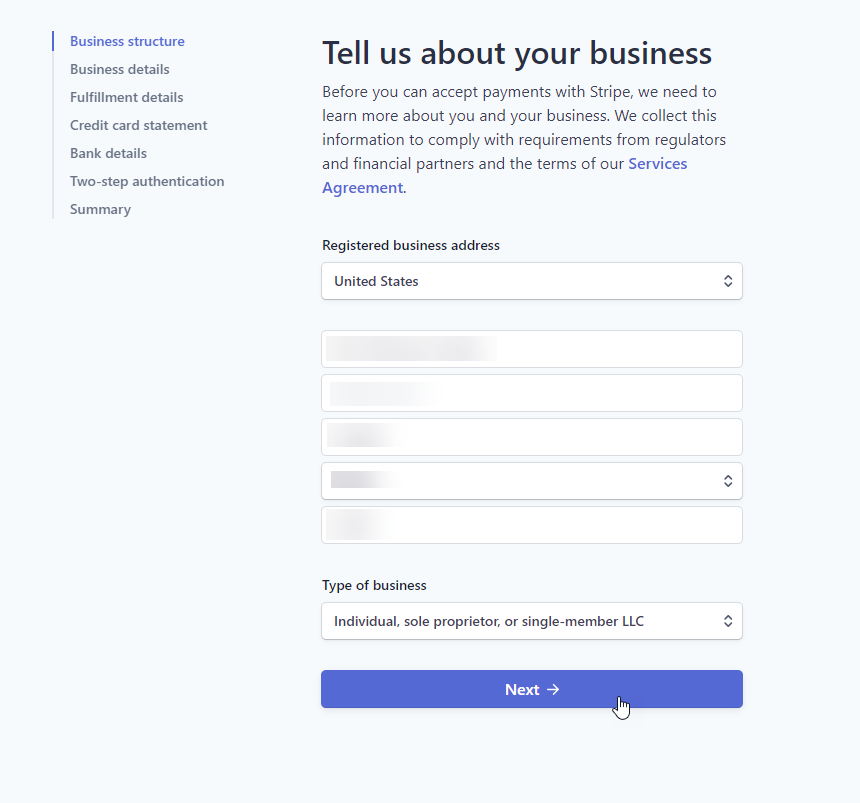
-
As the business owner or representative, enter your personal details like you DOB and Home address.
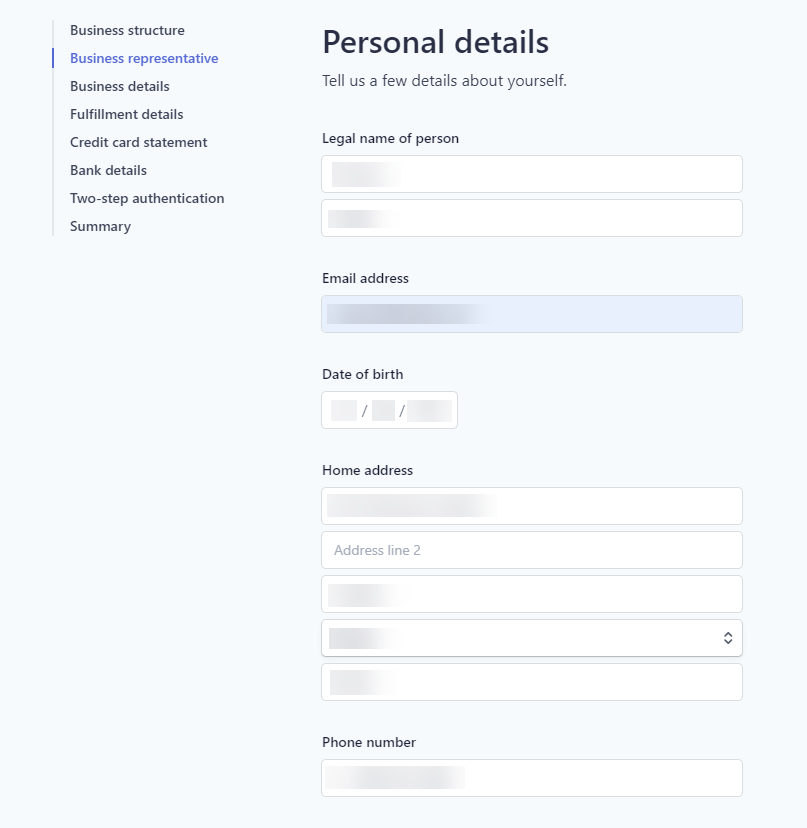
-
Enter your business details. Select your Industry and enter your business's website. This does not have to be your AuctionWorx website address but it can be.
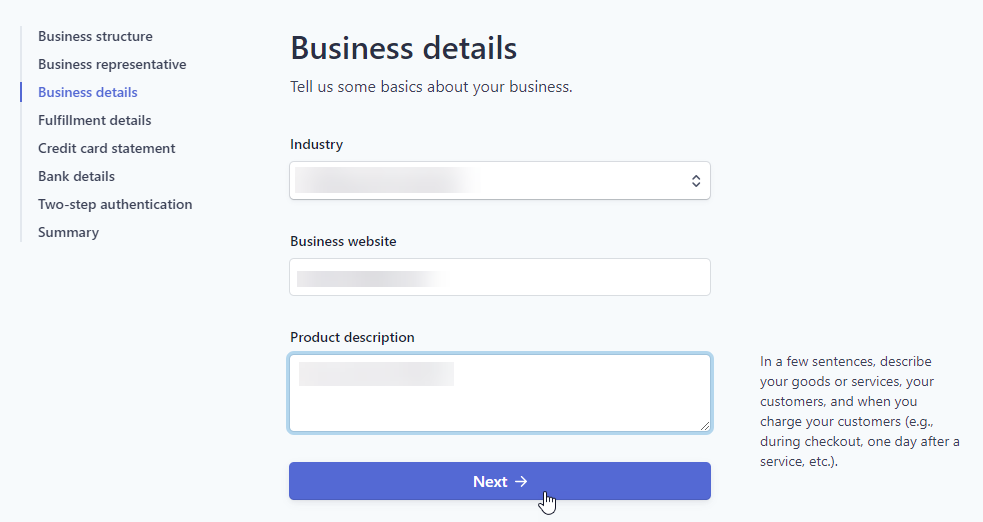
-
Enter your Fulfillment details. If products are picked up choose no to the question about shipping.
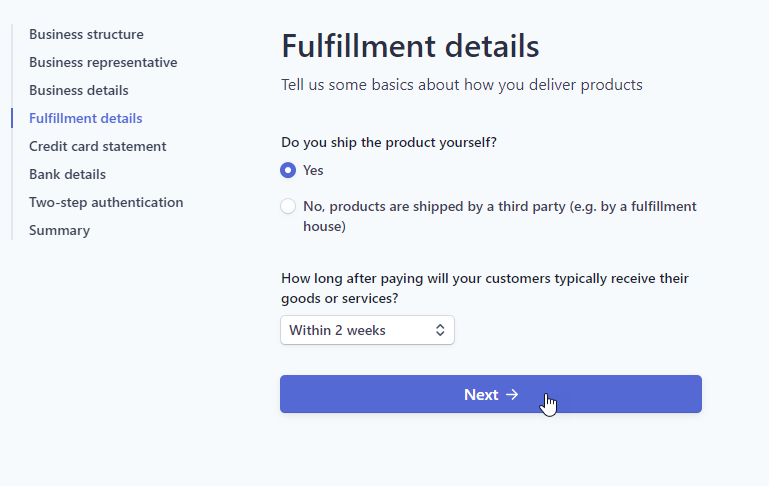
-
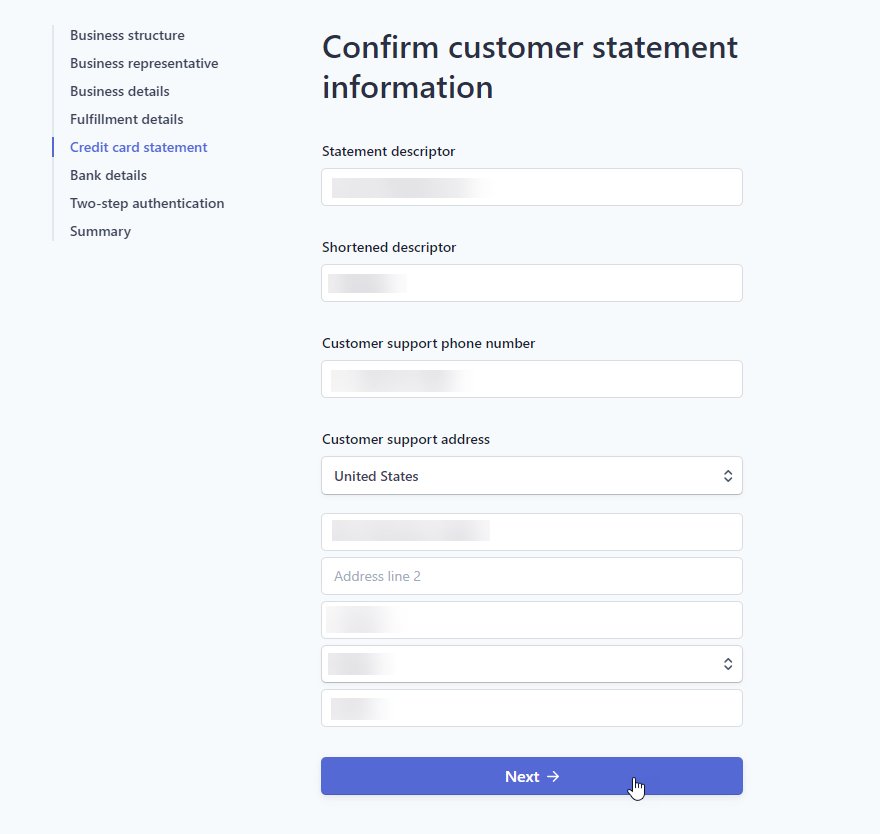
Enter the customer statement information. This information may be included on a credit card statement when someone buys an item from your site.
-
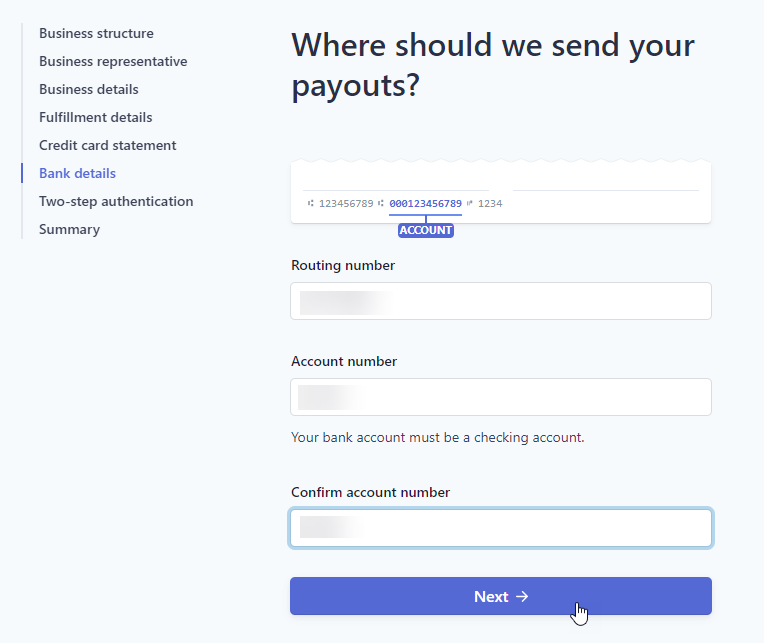
Enter the Bank details of the bank account you wish to receive your Stripe payments.
-
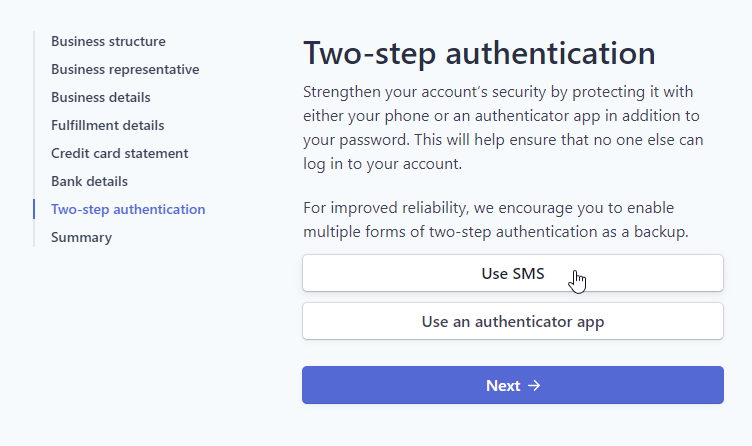
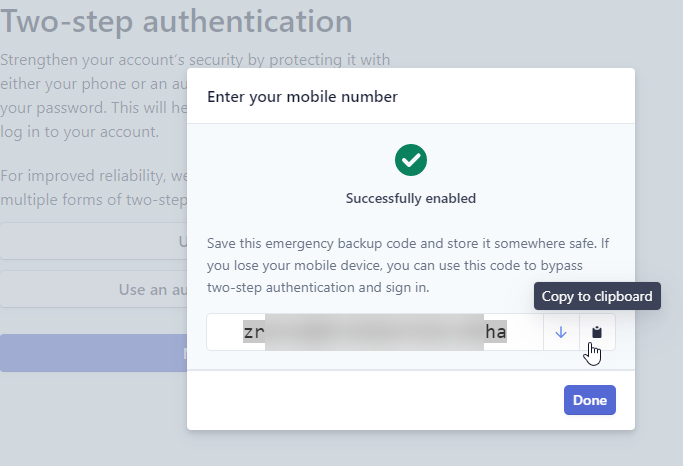
Setup Two-step authentication. Click Use SMS to have sign in codes sent to you via text message. You will be given a code to allow for logging into your Stripe account if you lose your phone. Be sure to copy this code to a safe place.
-
Review all of the information in the Summary and then click Done if it all looks right.
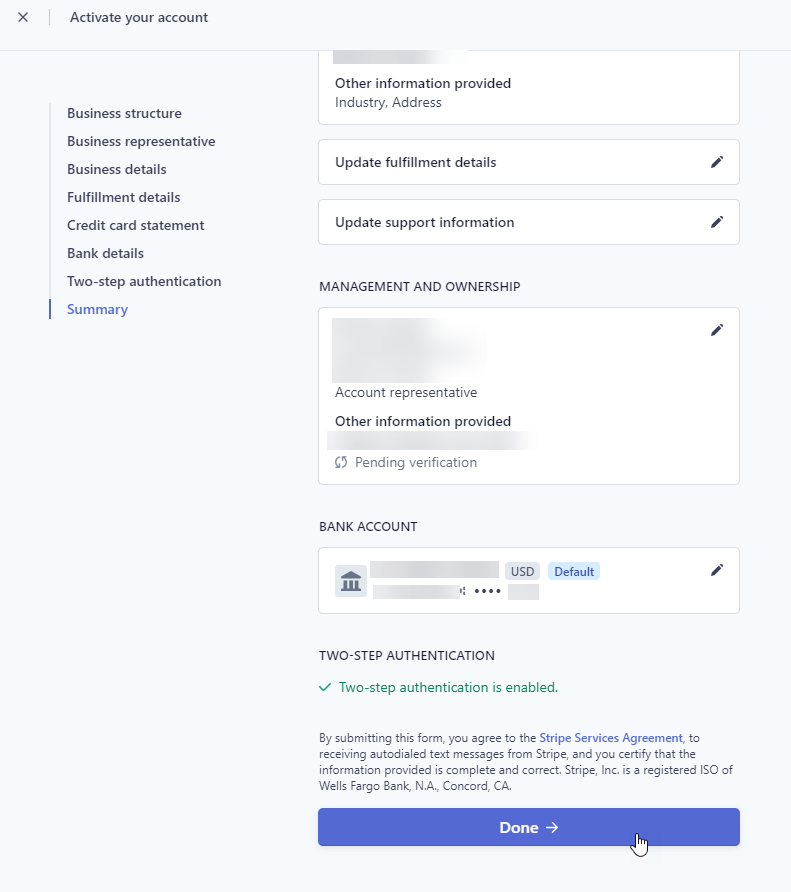
Now that the application for Stripe is done, you may need to wait a day for Stripe to verify your information to be validated by Stripe. Once this part of the process is done you should receive an email from Stripe with the subject "Welcome to Stripe!"

Setting up Stripe Connect
Note
Setting up Stripe Connect can be skipped if you only intend to use a single Stripe account with the software. To allow third party Stripe accounts to be added to AuctionWorx, you'll need to setup Stripe Connect.
With the above steps completed, Log in to Stripe.com to view the Stripe Dashboard.
-
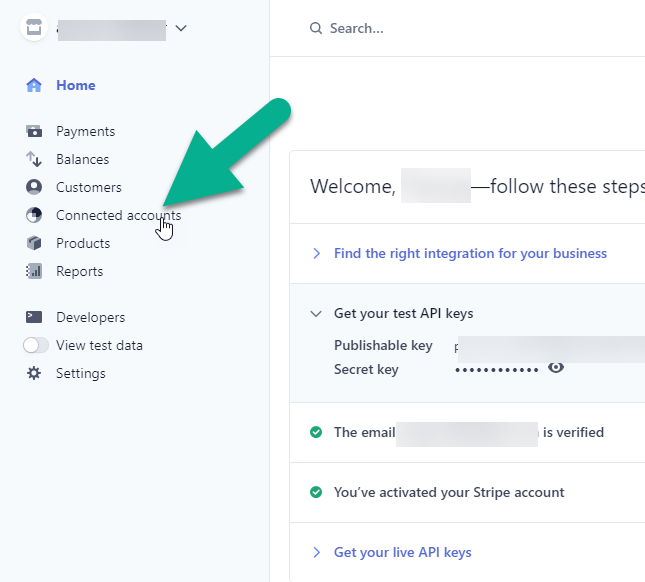
On your Stripe Dashboard click Connected accounts from the left hand navigation.
-
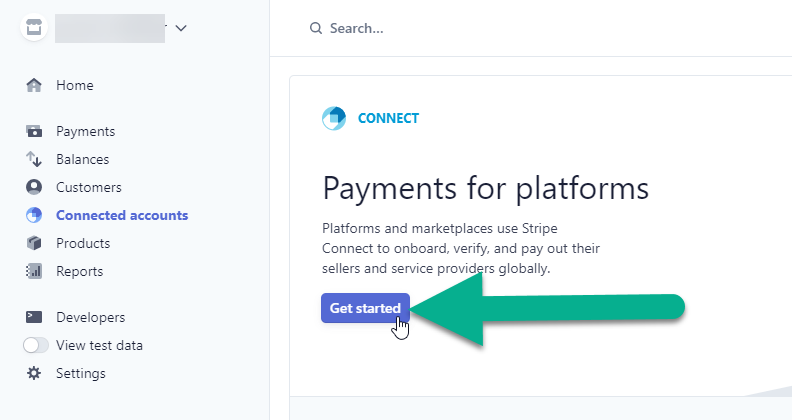
Click the Get started button.
-
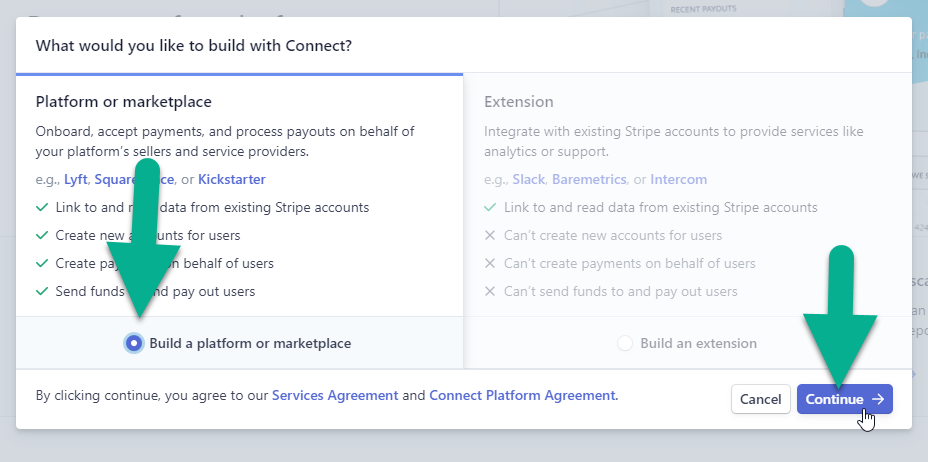
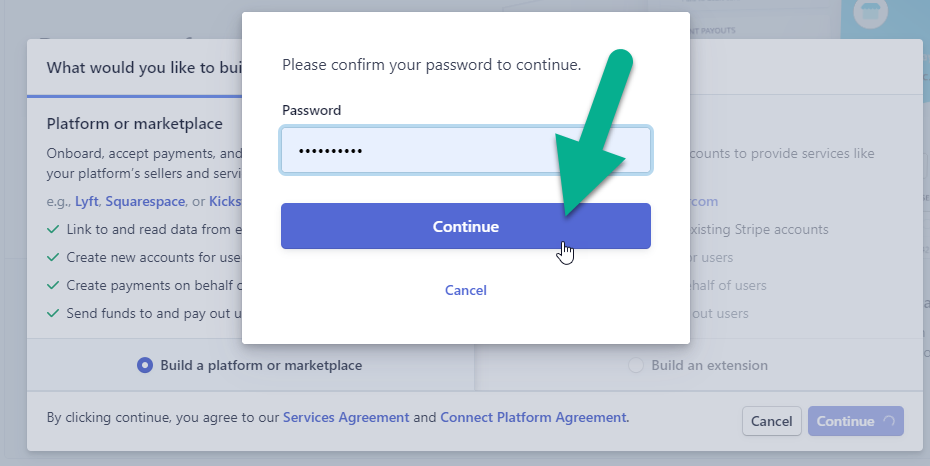
Choose Build a platform or marketplace then click Continue.
-
Enter your Stripe password and click Continue.
-
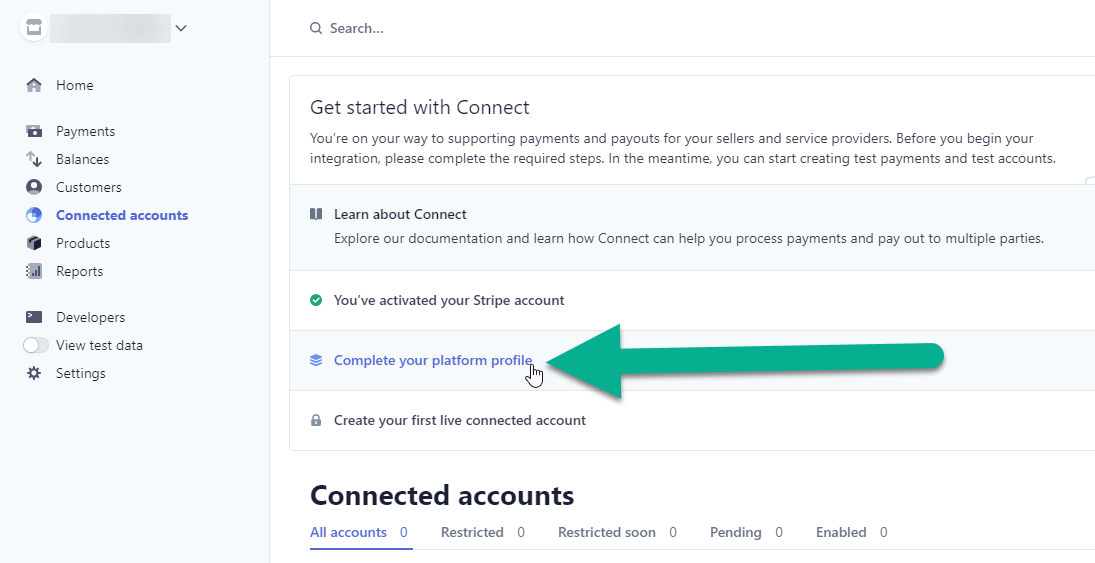
The next step is to click Complete your platform profile.
-
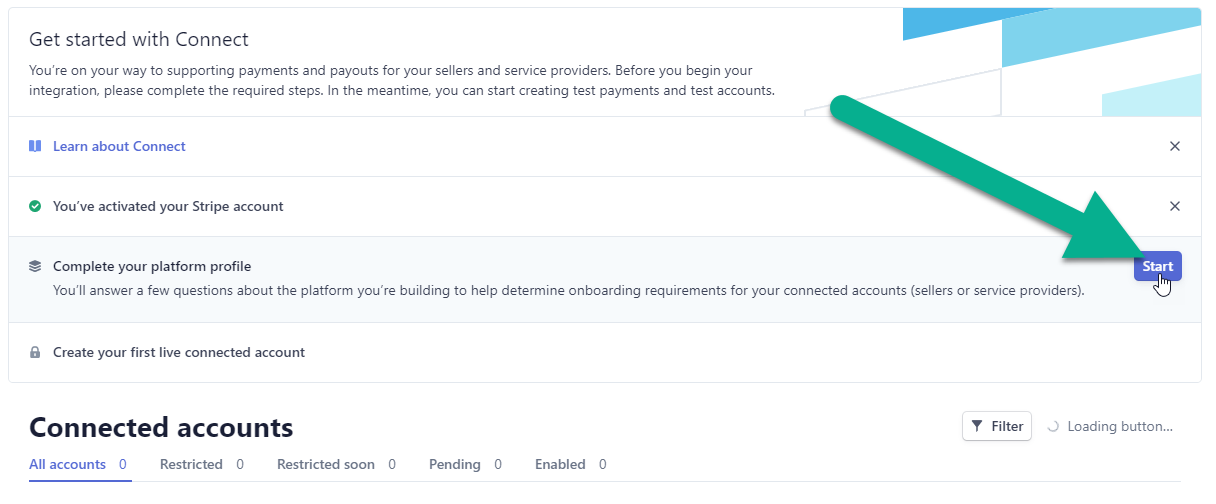
Then click Start.
-
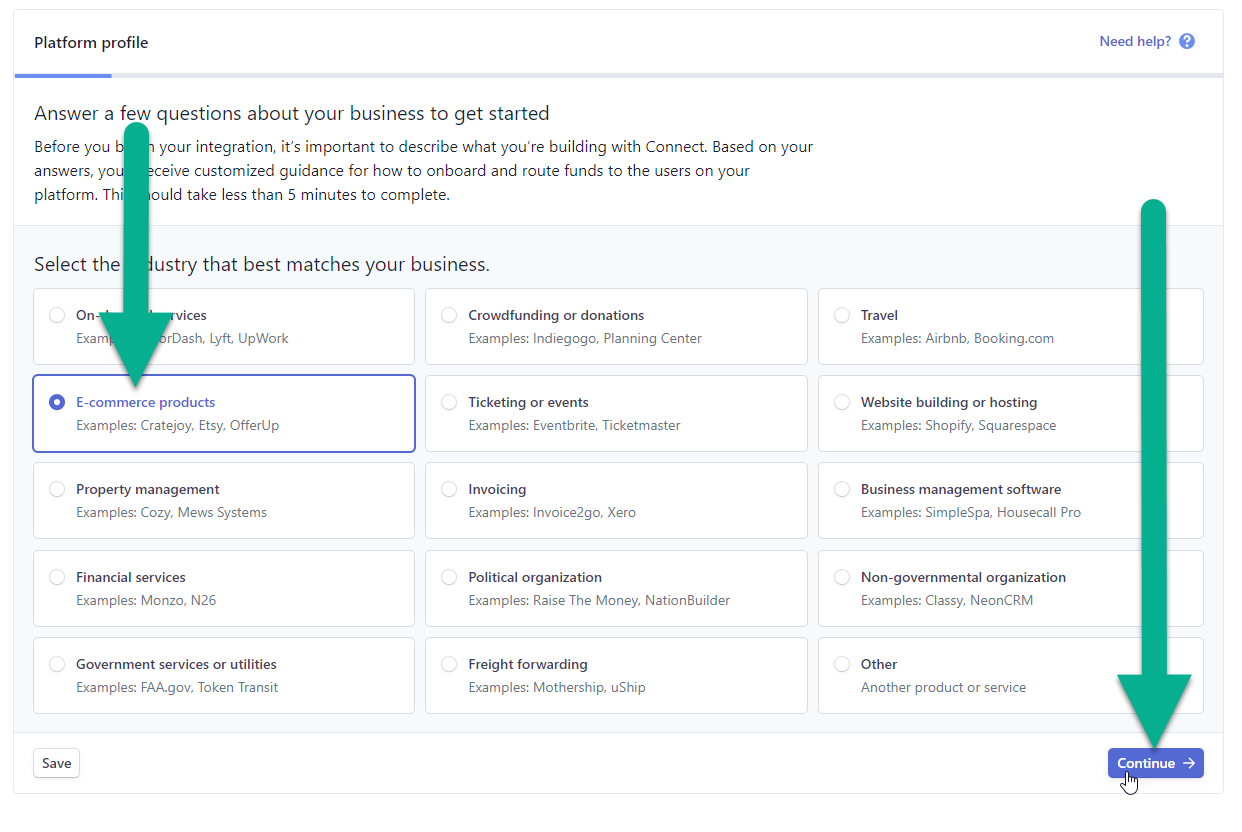
Select E-commerce products then click Continue.
-
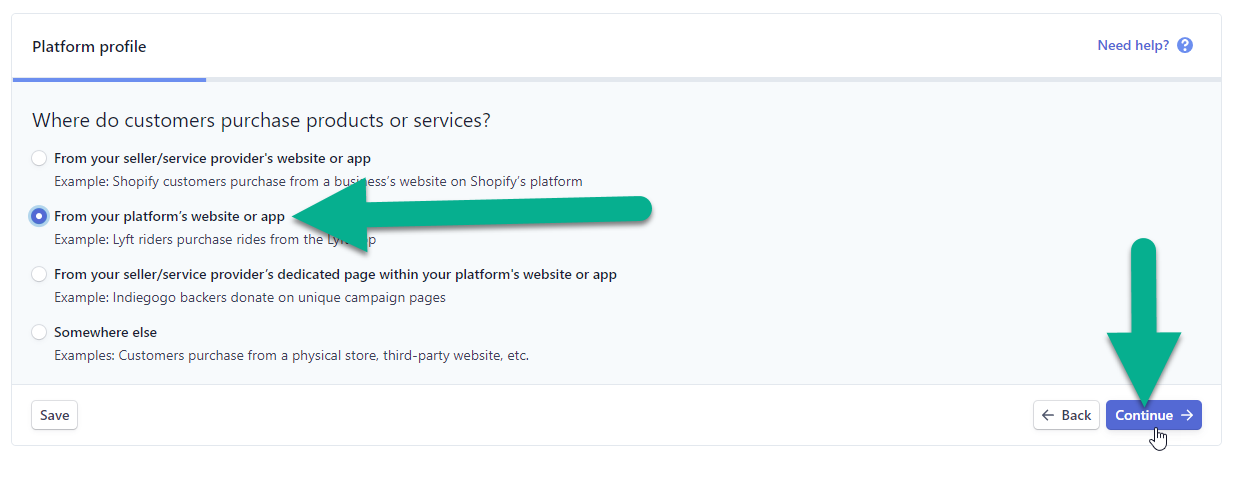
Select From your platform's website or app then click Continue.
-
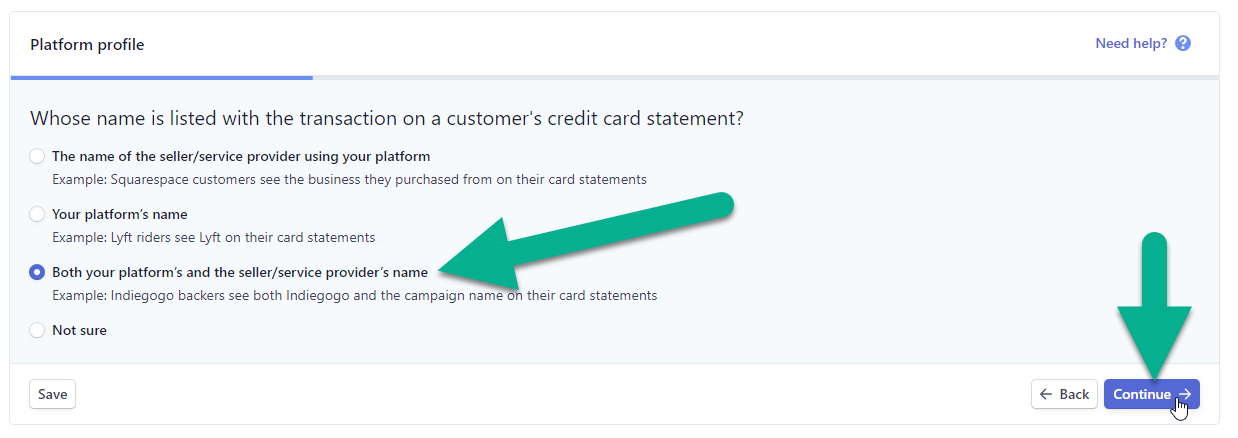
Select Both your platform's and the seller/service provider's name then click Continue.
-
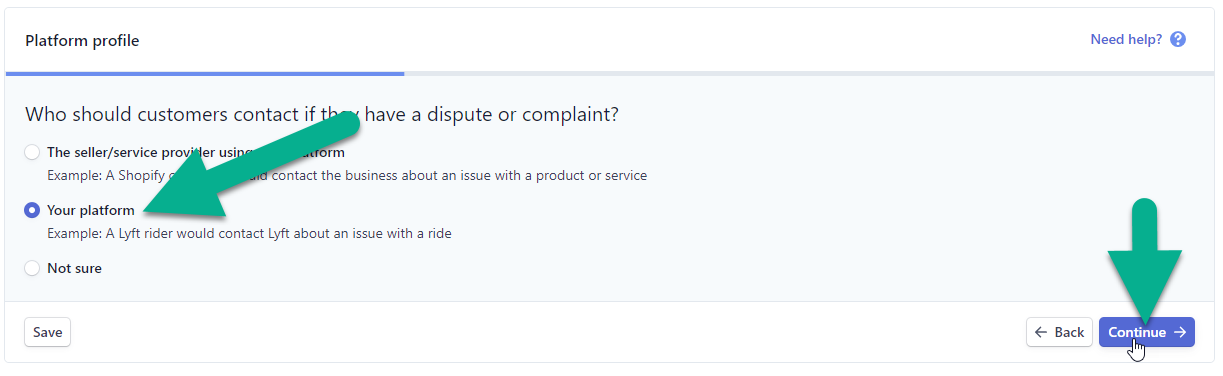
Select Your platform then click Continue.
-
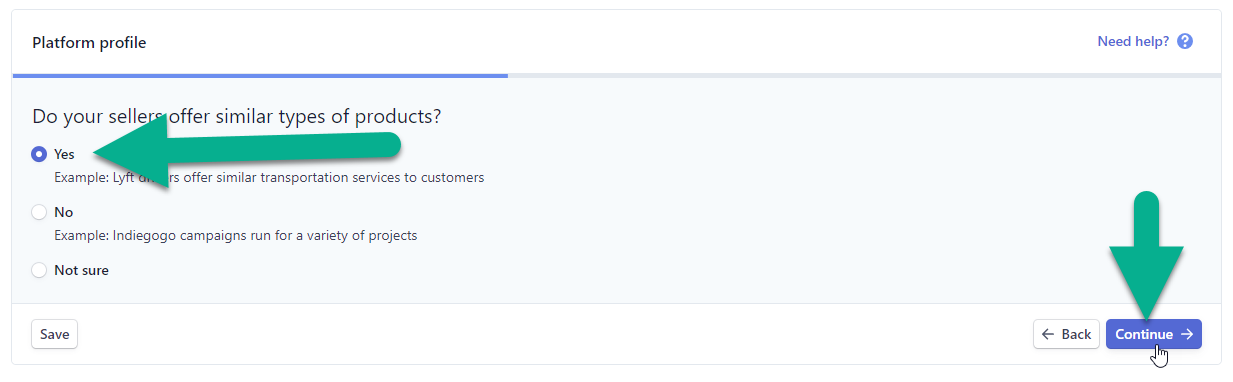
Select Yes then click Continue.
-
Select No then click Continue.
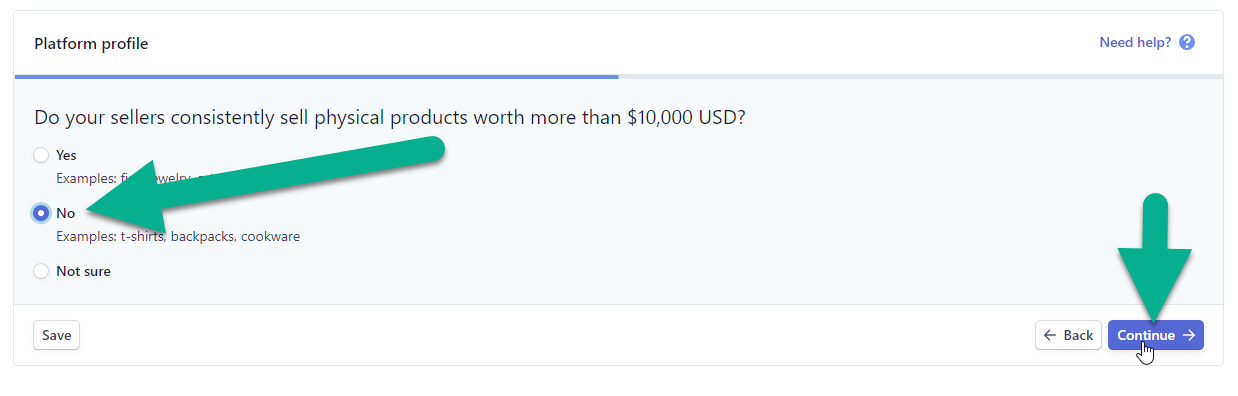
-
Review the summary and confirm that you've answered the questions accurately then click Submit.
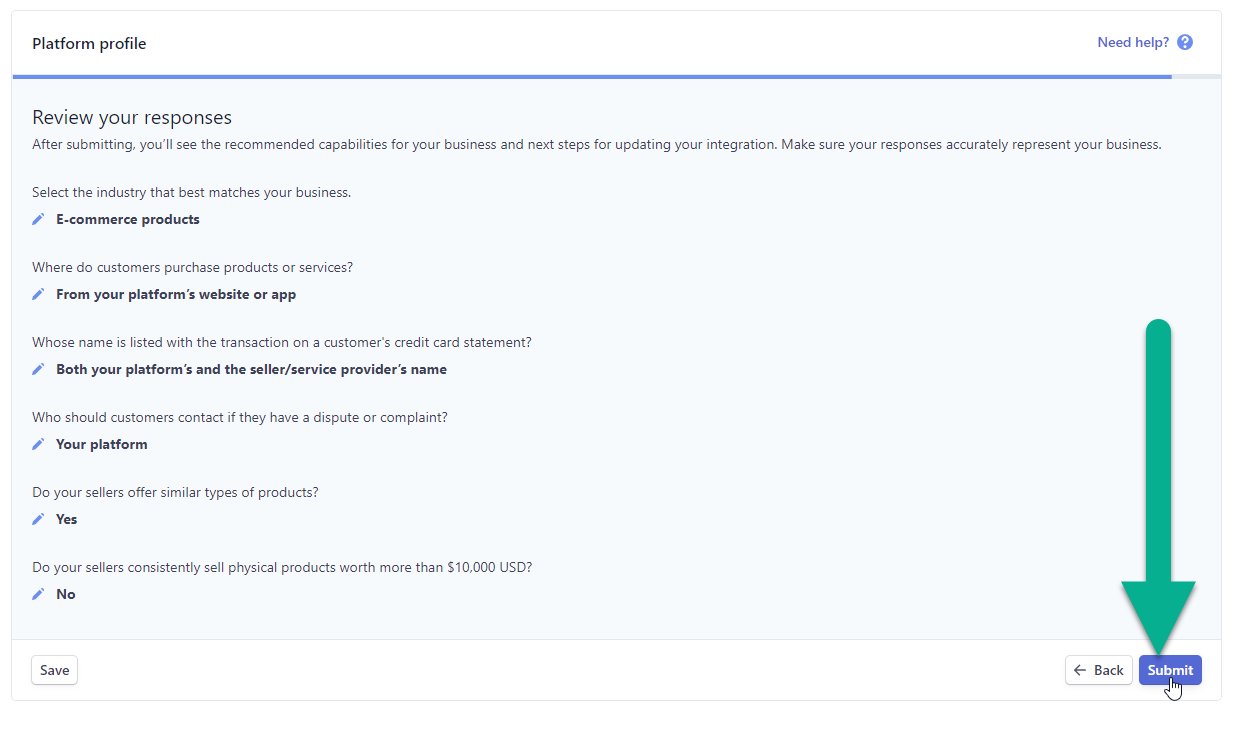
At this point you should be done setting up the Stripe Connect account. The following section will describe Plugging in the API Keys and Setting up the End Points.
Plugging in the API Keys
Now you need to open up AuctionWorx in one tab and your Stripe Dashboard in a separate tab to transfer some information from Stripe to AuctionWorx.
-
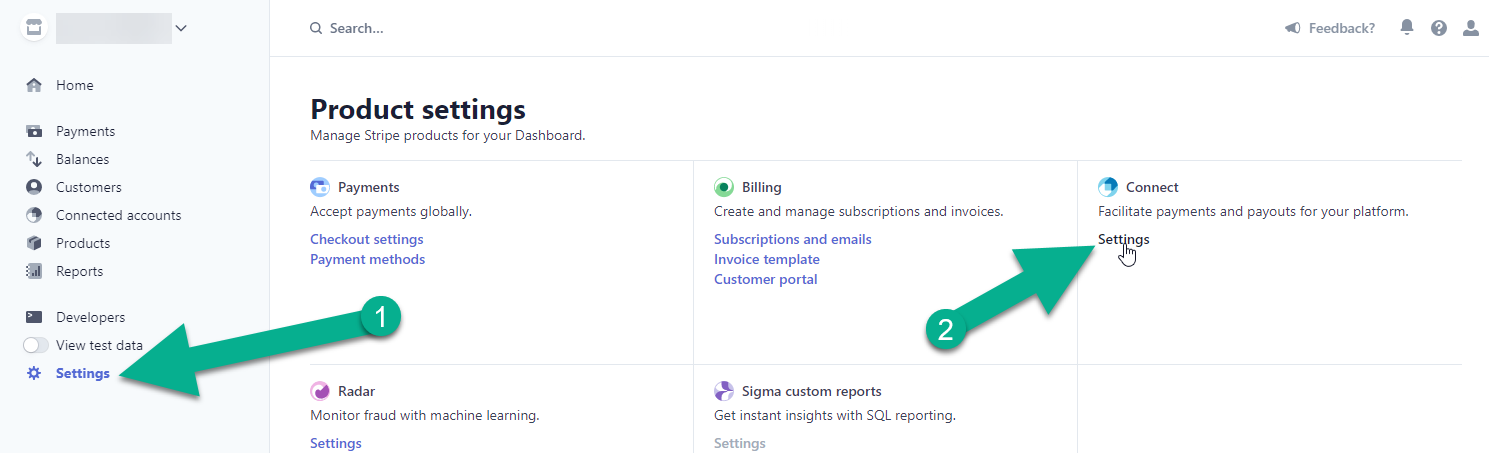
In Stripe, on the left hand navigation, click Settings then click Connect Settings.
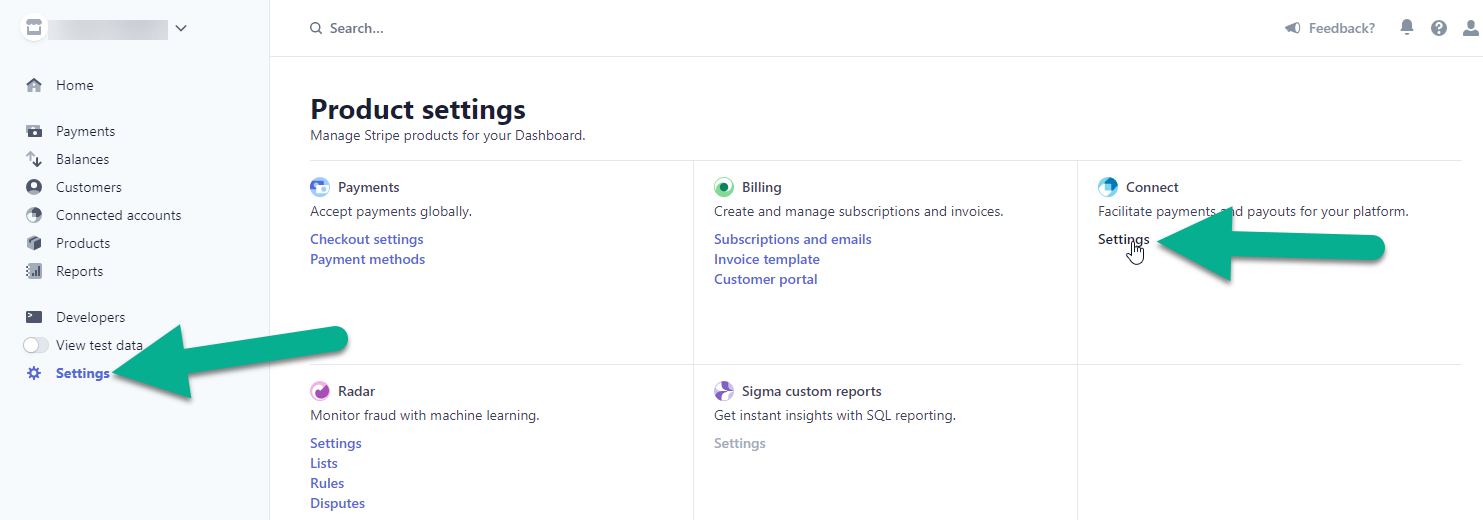
-
On Stripe, scroll down to the Integration section and copy the Live mode client ID.
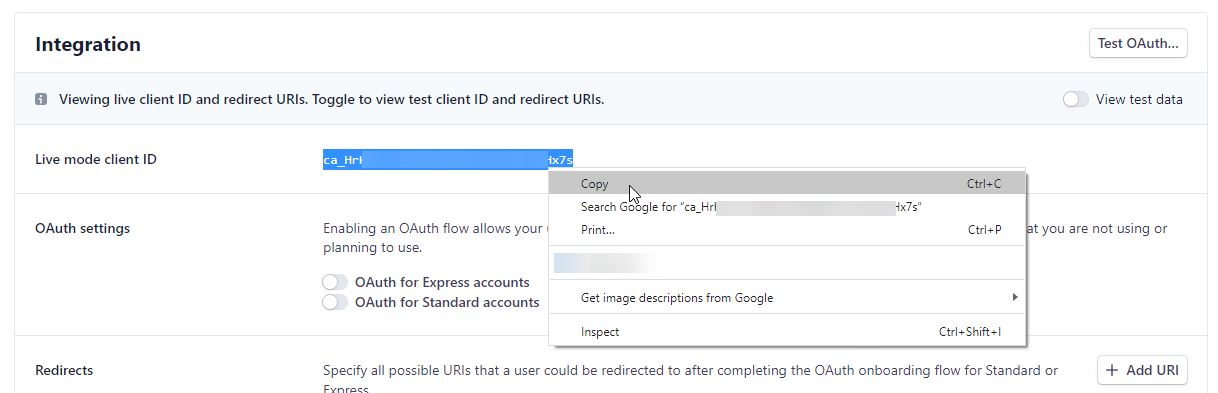
-
In AuctionWorx, navigate to the Admin Control Panel > Billing & Fees > Payment Providers page.
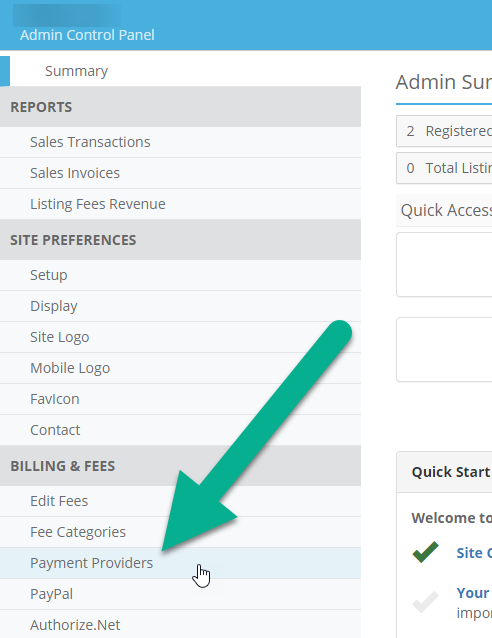
-
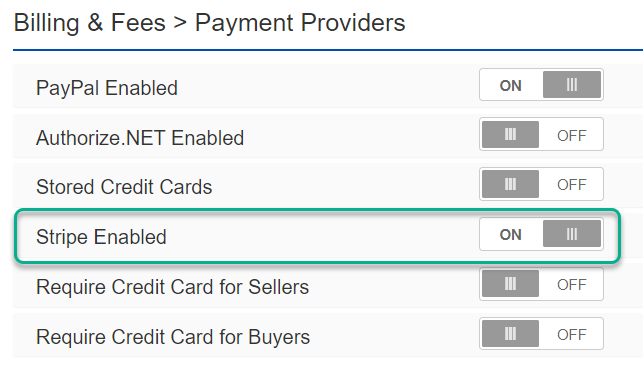
Turn on the Stripe Enabled setting and then click the Save Configuration button.
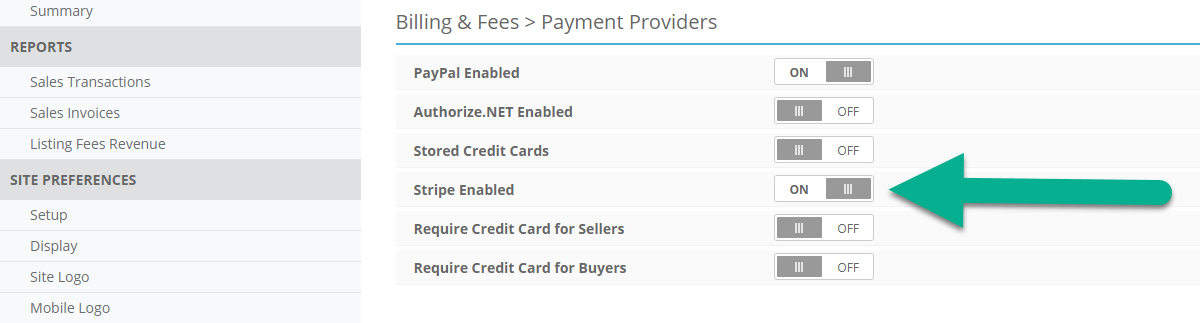
-
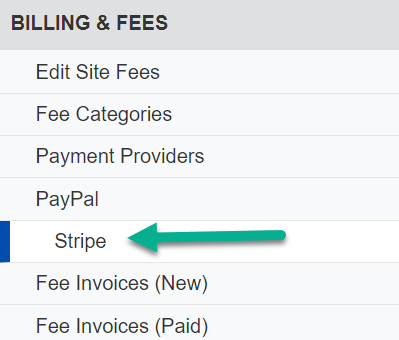
AuctionWorx should automatically redirect to the Admin Control Panel > Billing & Fees > Stripe page where you can paste in the Client Id.
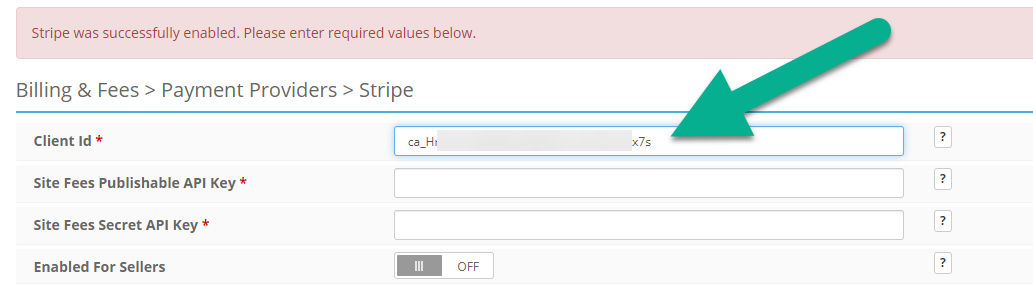
-
On Stripe, click on Developers link in the left hand navigation.
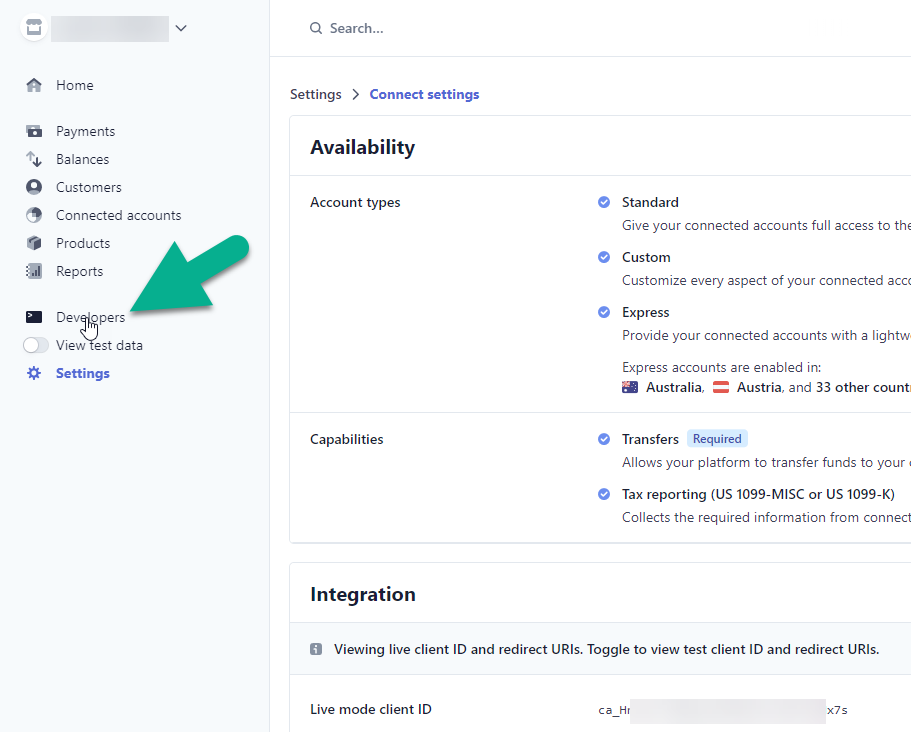
-
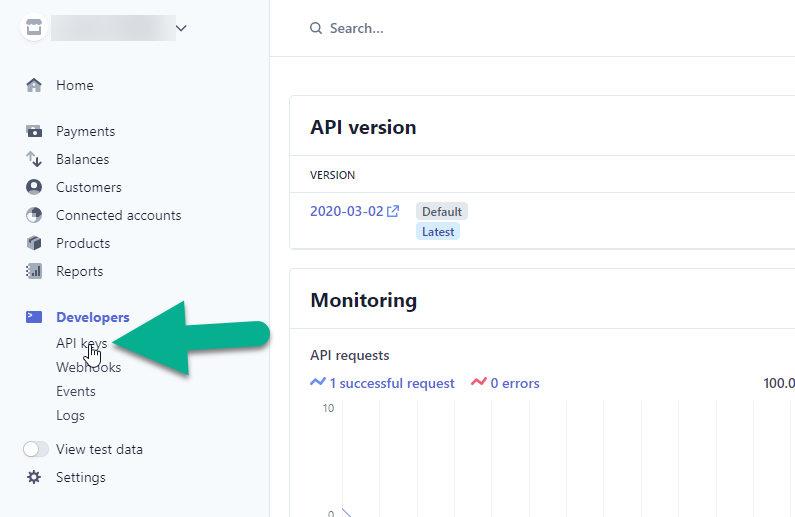
Then click the API keys link.
-
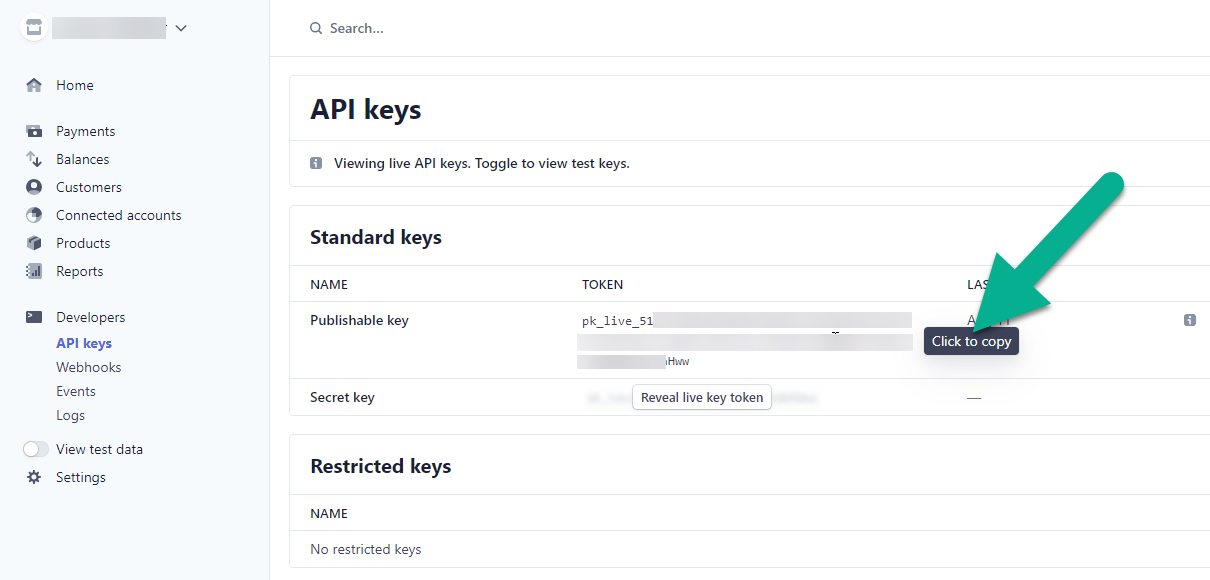
On Stripe, click the Click to copy button to copy the Publishable key.
Note
Note: The Publishable key should start with "pk_live". If it doesn't, make sure that the View test data toggle at the bottom of the left hand navigation is turned off.
-
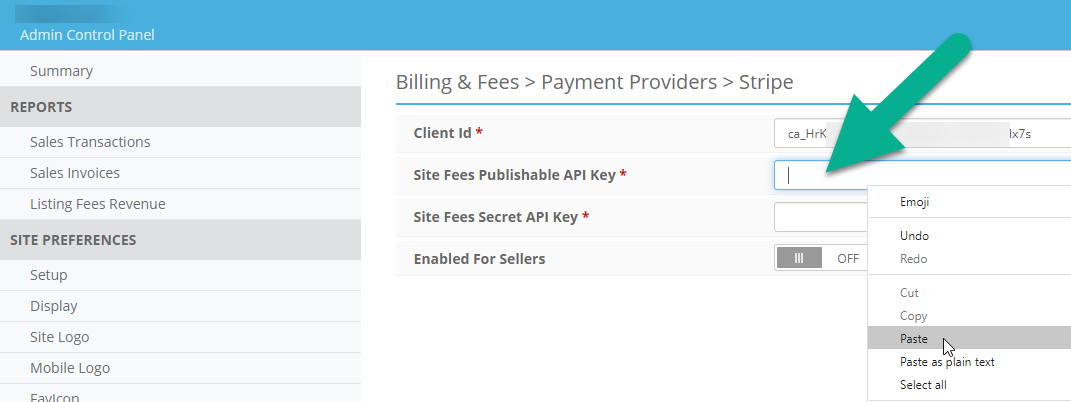
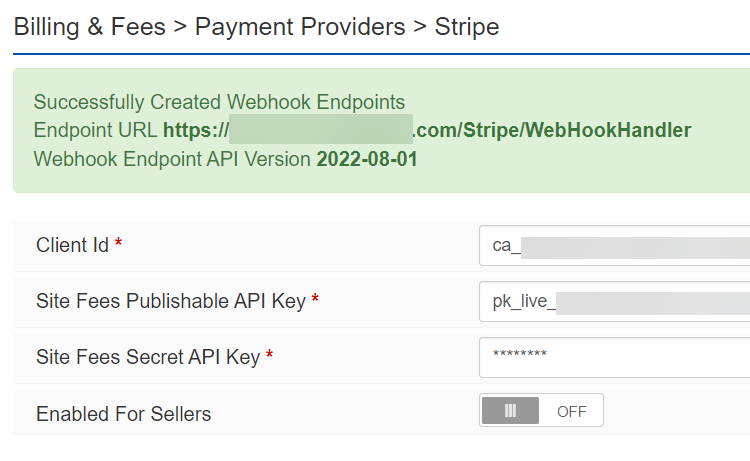
In AuctionWorx, paste the Publishable key into the Site Fees Publishable API Key field.
-
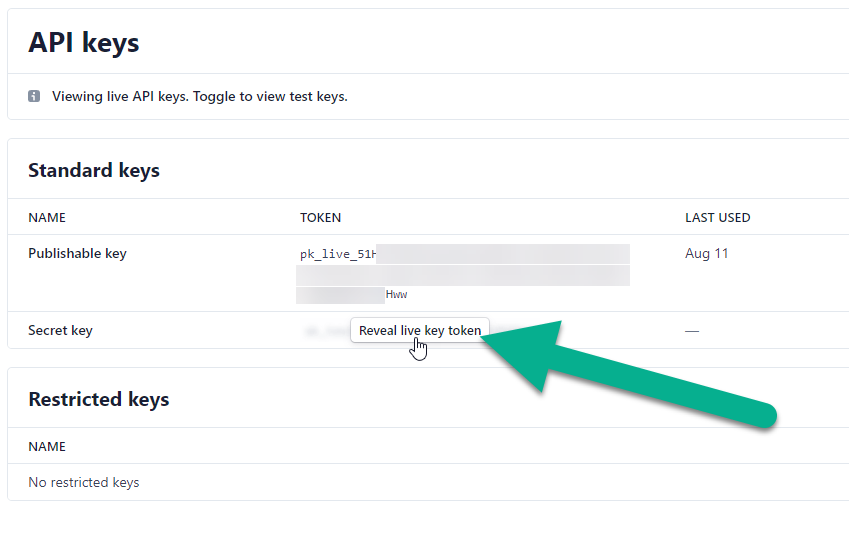
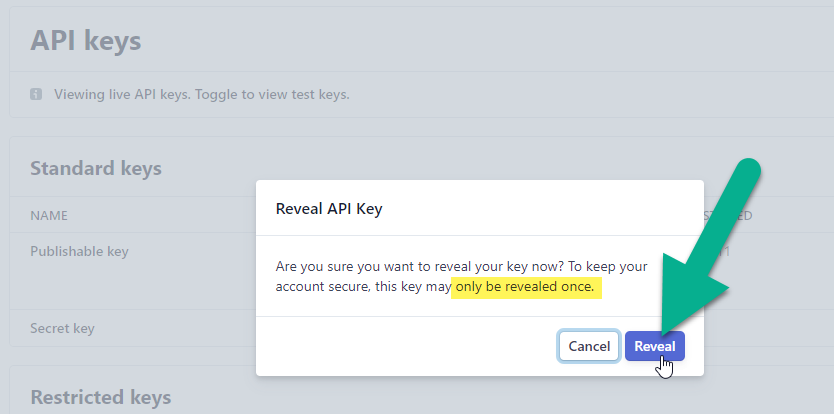
On Stripe, click the Reveal live key token button.
-
Click the Reveal button.
Note
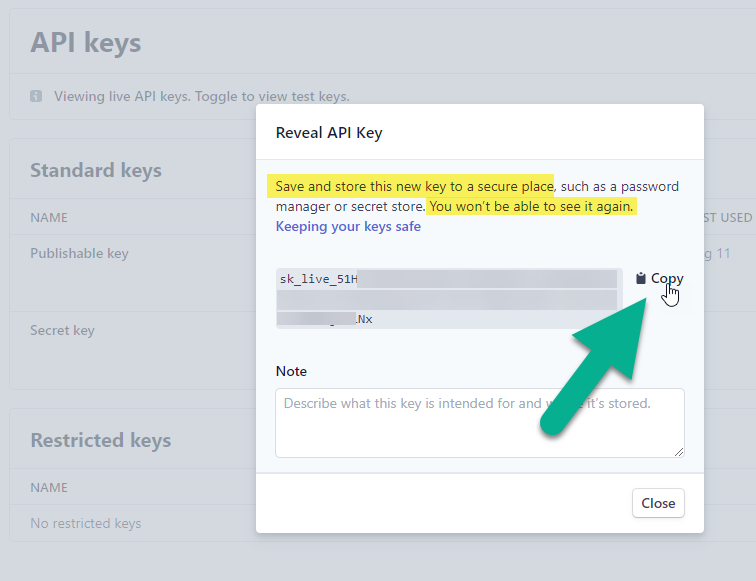
This key will only be revealed once but, you may need to enter this key in multiple places throughout this process. Copy the Secret key to your notes so that you can access it again later.
-
Click the Copy button to copy the Secret key.
-
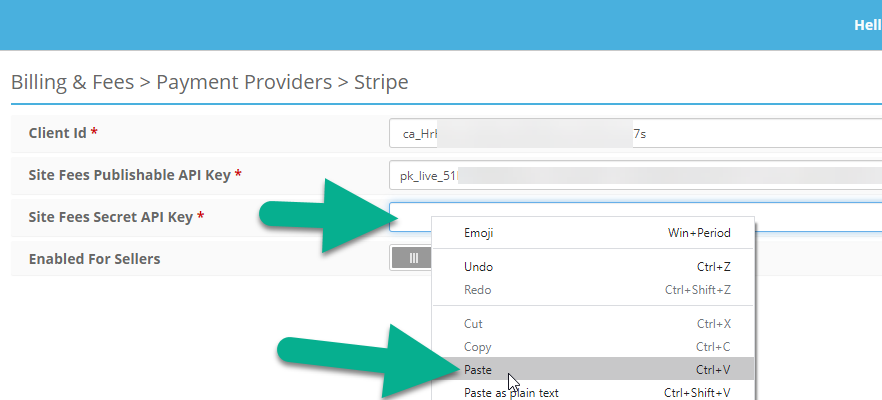
In AuctionWorx, paste this key into the Site Fees Secret API Key field.
-
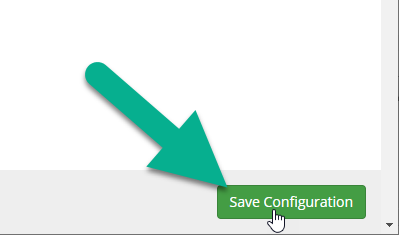
Click Save Configuration at the bottom right hand corner.
At this point you should be done Plugging in the API Keys.
Note
As of AuctionWorx v3.5 build 8333, the Webhook Endpoints are automatically added to your Stripe account once you click Save Configuration.
Setting up Webhook Endpoints
Stripe needs two more pieces of information about the platform to allow for communication between AuctionWorx and Stripe. The Webhooks and the Redirect URI.
Overview of setting up Webhooks
Load the Admin Control Panel > Billing & Fees > Stripe page to initiate the setup of the new Webhook Endpoints on your Stripe account.
Note
to view the Stripe page, Stripe needs to be enabled from the Admin Control Panel > Billing & Fees > Payment Providers page.
In order to trigger this process to update the Stripe Webhook Endpoints, visit the Admin Control Panel > Billing and Fees > Stripe page.
After updating this page with your Client ID and API Keys, you should see a green success message.
Redirect URI
-
Navigate to the Settings link on the right hand side, then click the Connect Settings link.
-
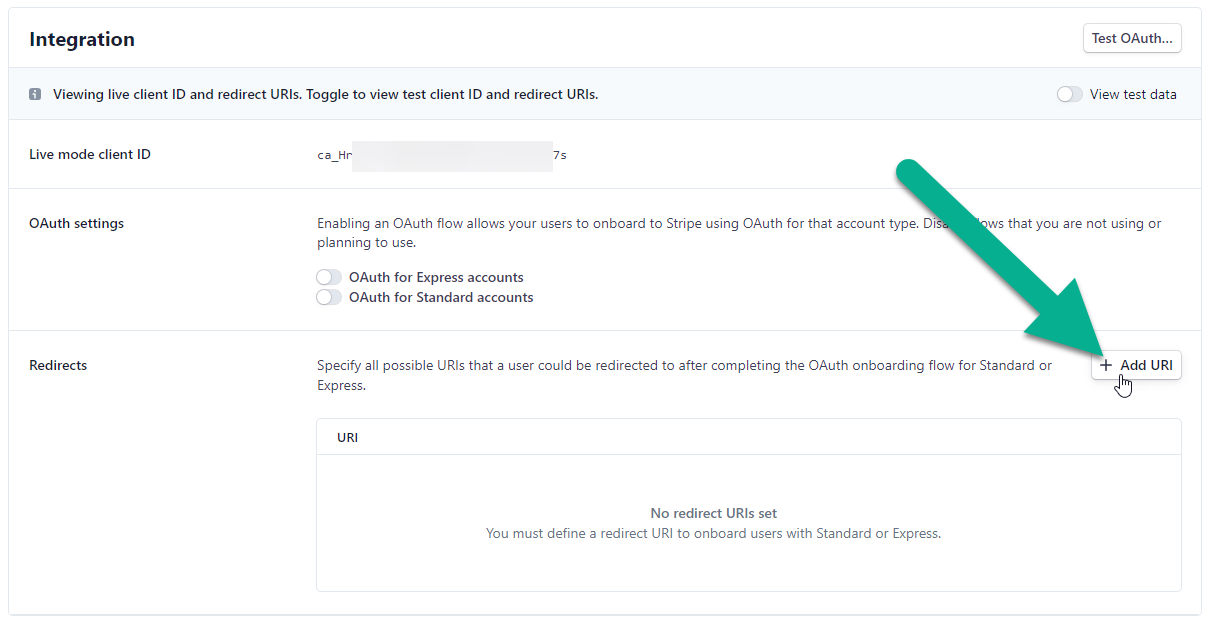
Scroll down to the Integration section and click the + Add URI button.
-
Enter the following (replacing "YourDomain.com" with the domain name of your AuctionWorx instance) into the Redirect URI text box. Then click the Add URI button.
https://YourDomain.com/Stripe/HandleStripeConnectResponse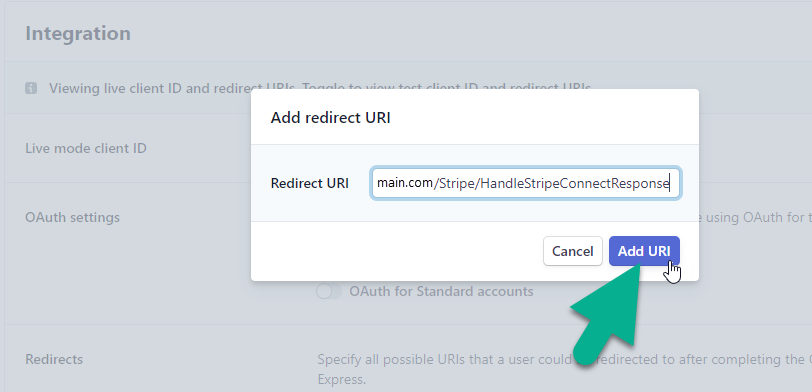
Note
Be sure to enter this with the same capitalization. Especially the "/Stripe/HandleStripeConnectResponse" part .
-
Finally, turn on the OAuth for Standard accounts feature found just above the Redirects section.
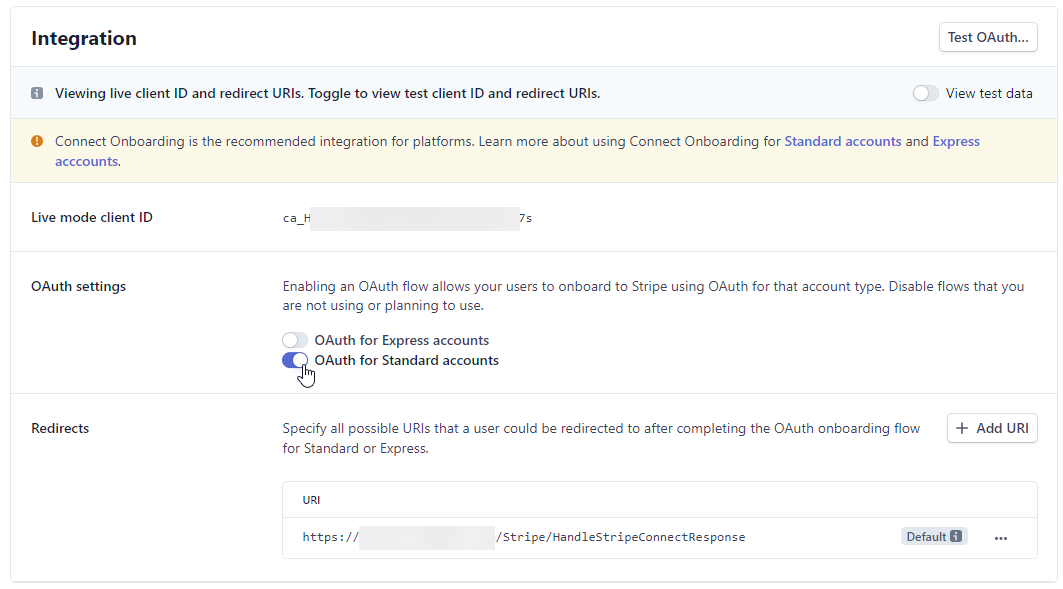
This concludes the Stripe Connect setup. At this point the rest of the configuration should be done from the AuctionWorx side.
To continue let’s configure Stripe in AuctionWorx: